
A discussion in the fischertechnik forum led to self-3D printing of various shapes and genders of the traditional game figure. Because cooperation was requested for a model building project to print the figures in a larger format, I started to fantasize and experiment with further personalizing the figures.
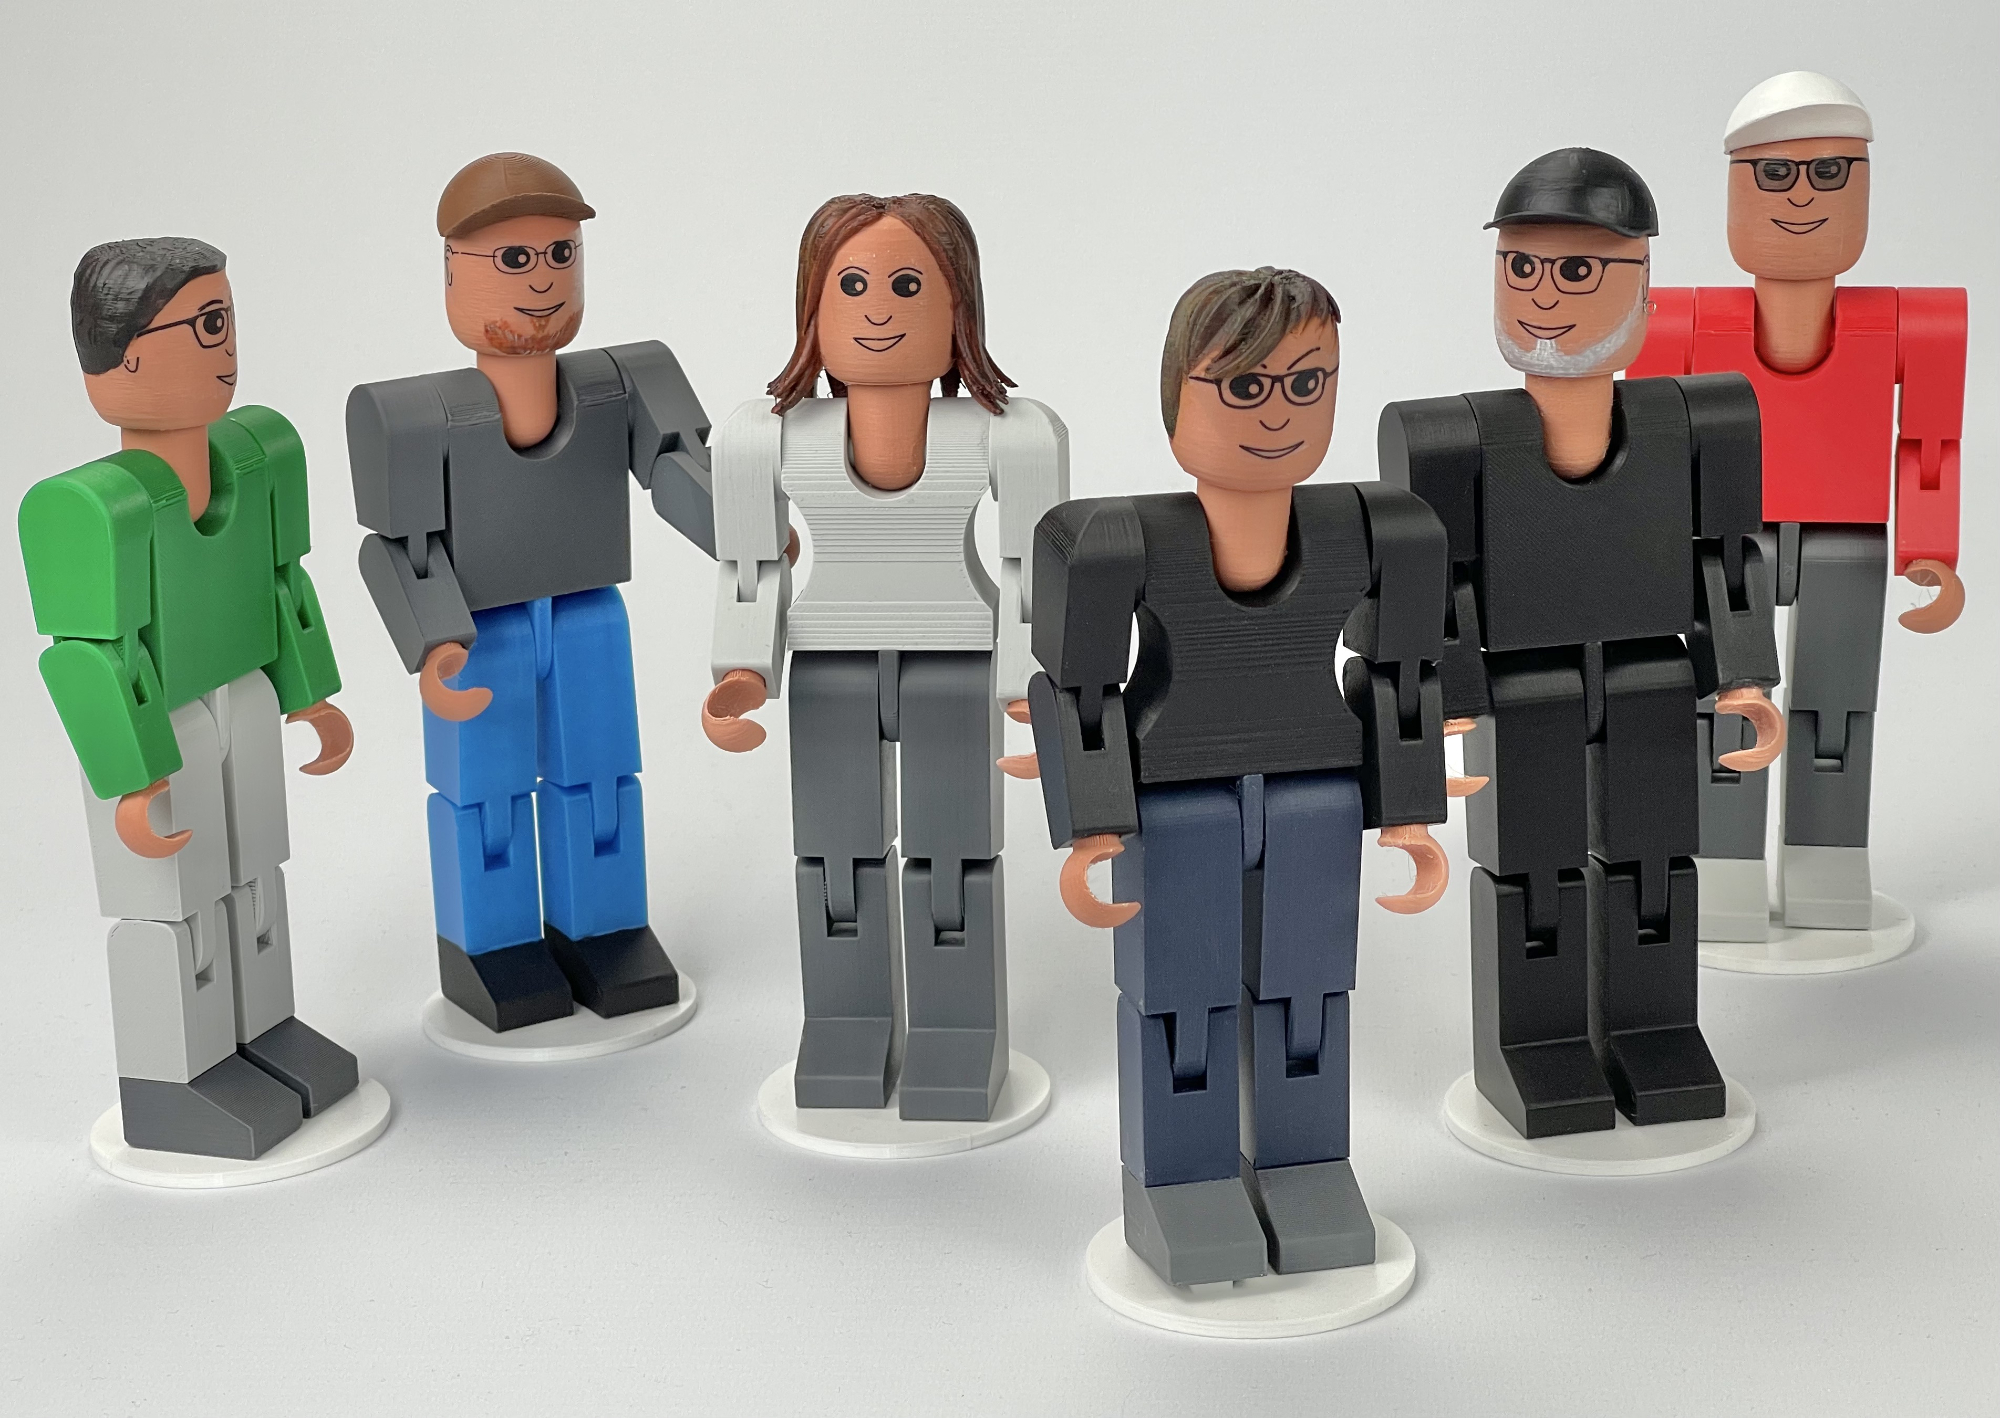
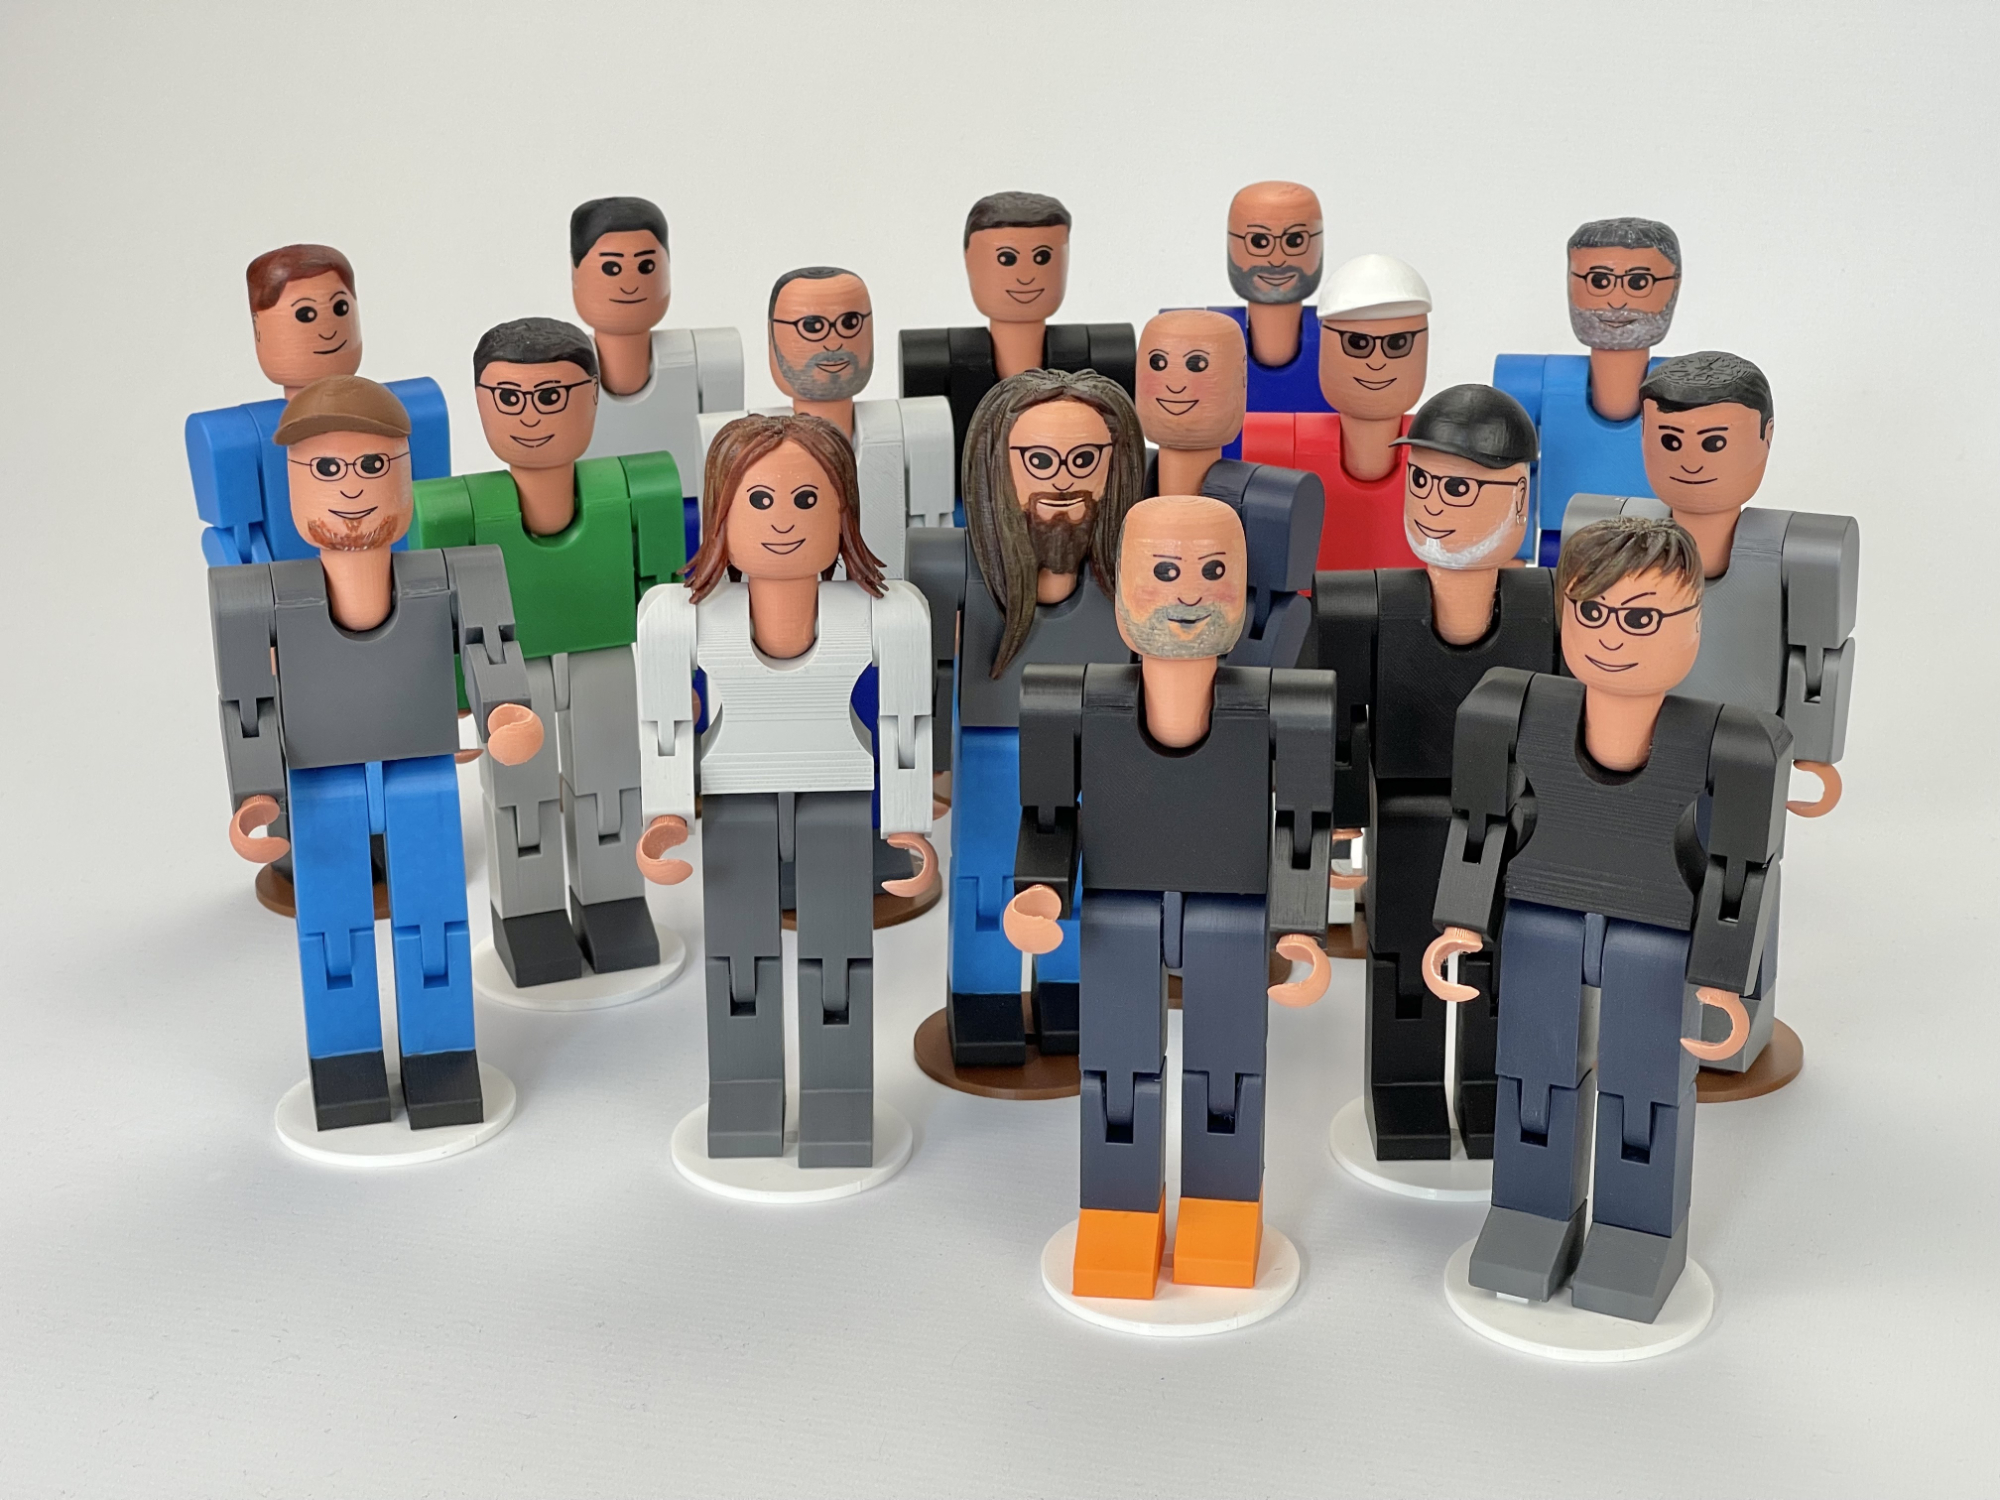
This, like other project ideas, quickly got out of hand. In the end I made almost twenty unique figures, with which I could surprise the team members of the 'Großprojekt Seilbahn' at the 'Bundesgartenschau 2023' in Mannheim (D).
The classic fischertechnik doll, and these self-printed variants, are 8.5 cm high. With an average human height of 170 cm, they therefore have a scale of approximately 1:20.
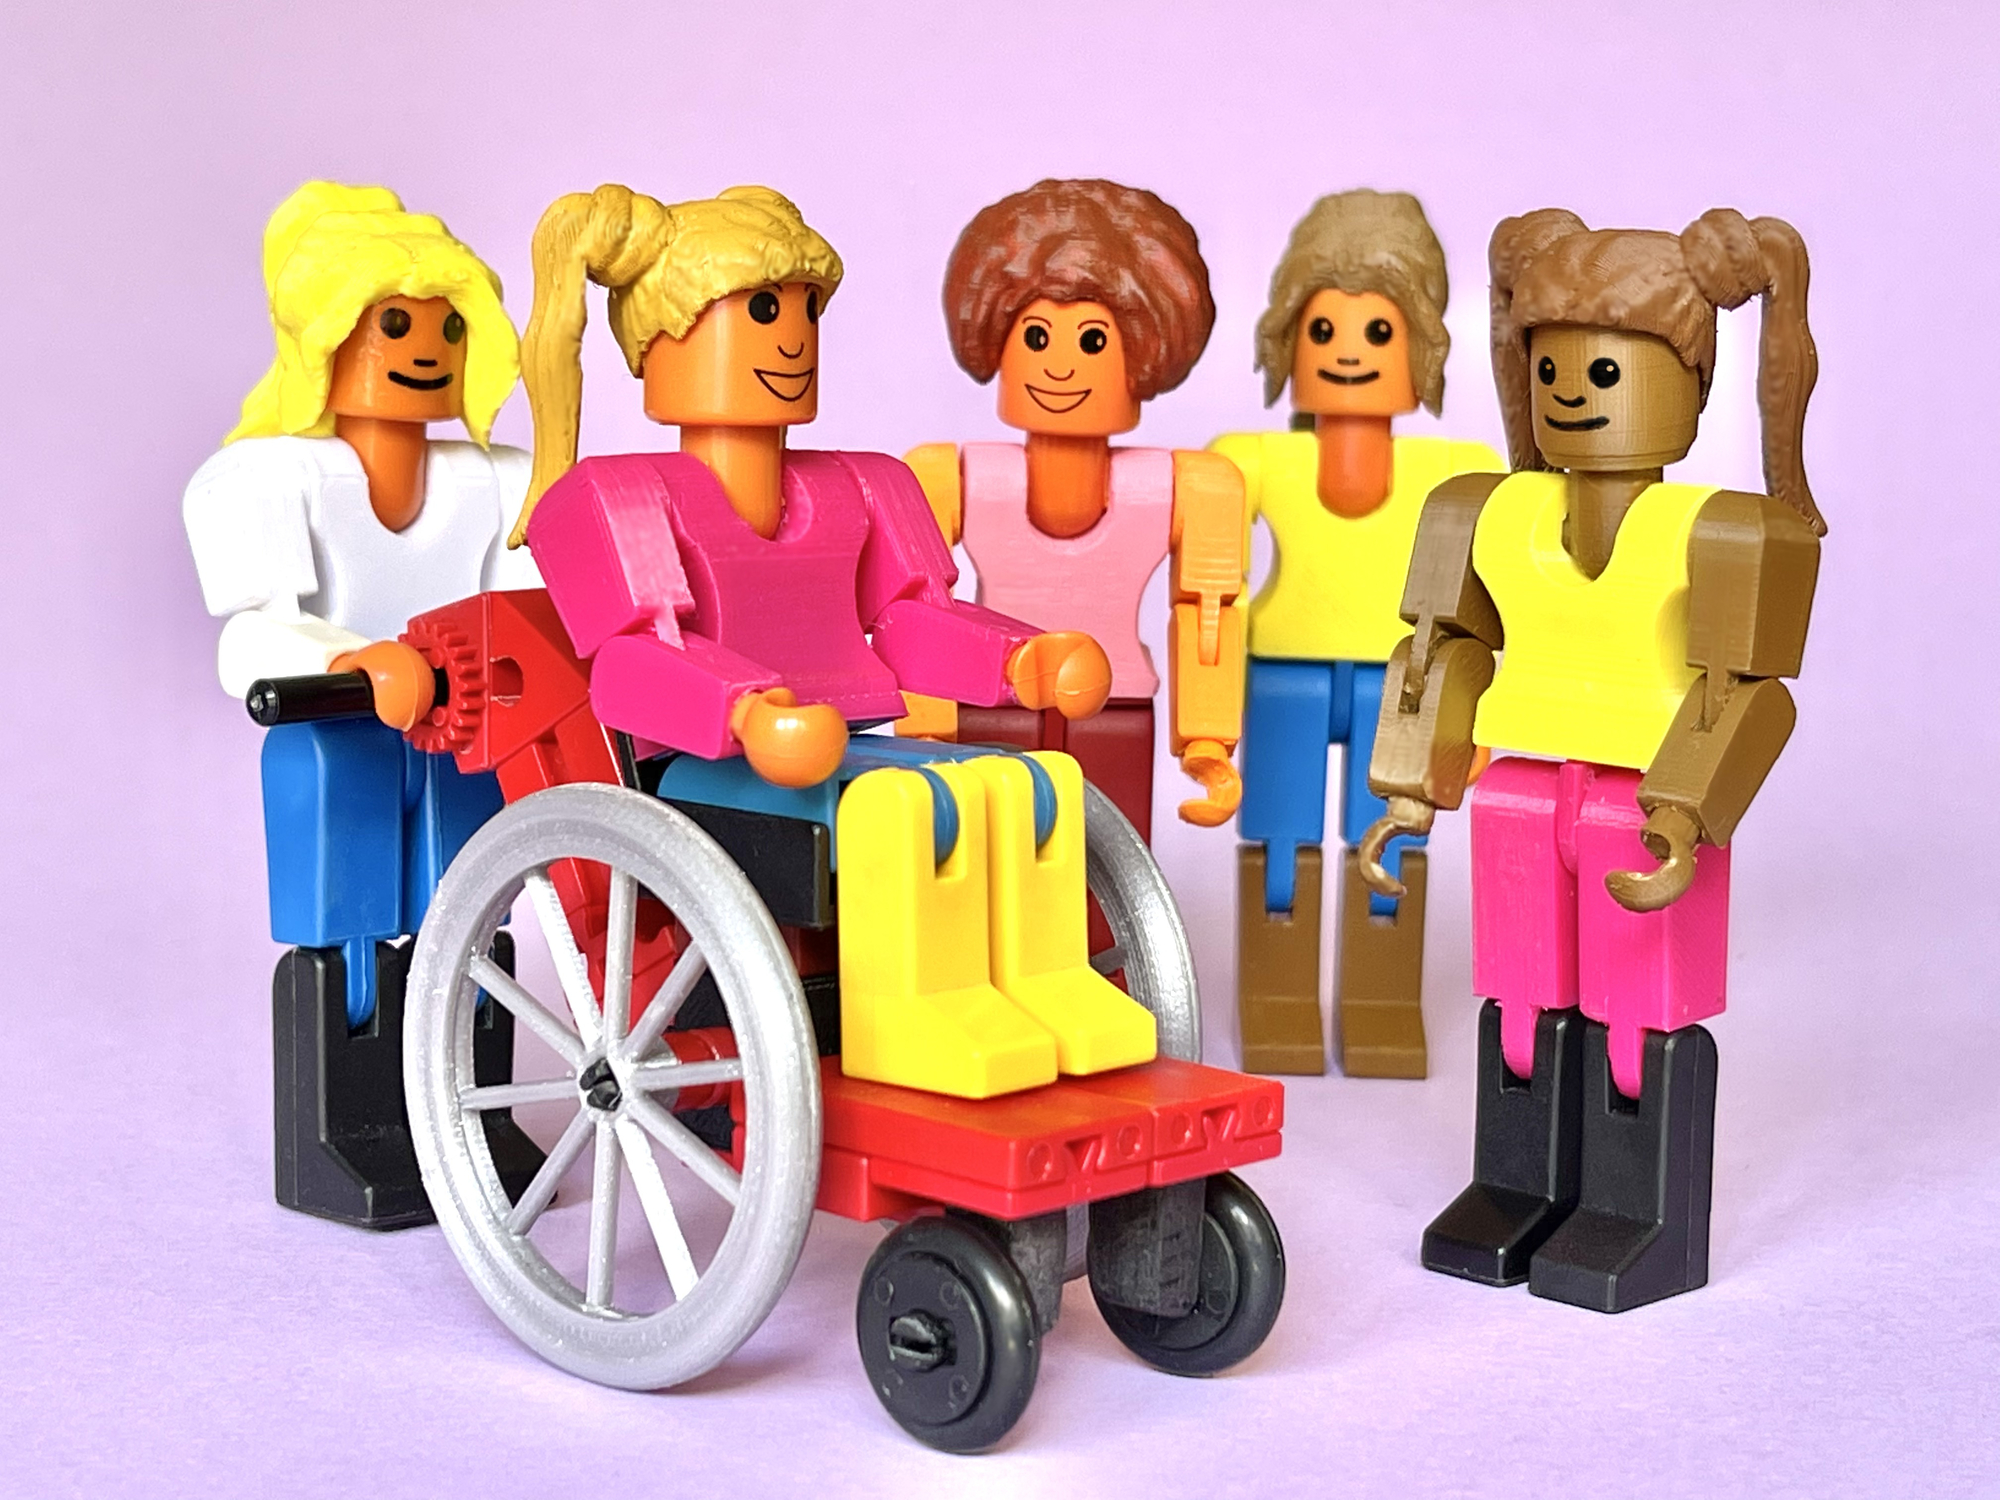
The forum discussion eventually led to a lot of creativity and various additional figures. In the club magazine of the Dutch fischertechnikclub I described, together with Jeroen Regtien, how we were inspired to print arms, bodies and hairstyles in order to increase the diversity of the figures. I myself liked to go even further than haircuts, and also made, for example, a clown, someone with a broken leg, a person in a wheelchair and a few dolls with specific professional clothing or attributes.
Coincidentally, before the discussion about the lack of a female fischertechnik figure arose in the forum, I happened to have already done useful '3D preliminary work'. Some time ago I wanted to feature this figure in the 3D animation in a video clip to support an article about lemniscates in a German engineering magazine. To that end, I had already modeled all the separate parts of the existing doll myself in the computer at the time. Although the design program 'fischertechnik designer' already included dimensionally accurate 3D models, in practice these turned out to be insufficiently detailed or not usable for animation in Blender. In the video, for example, the shoulders had to be given a little more freedom of movement to the side than in the original.
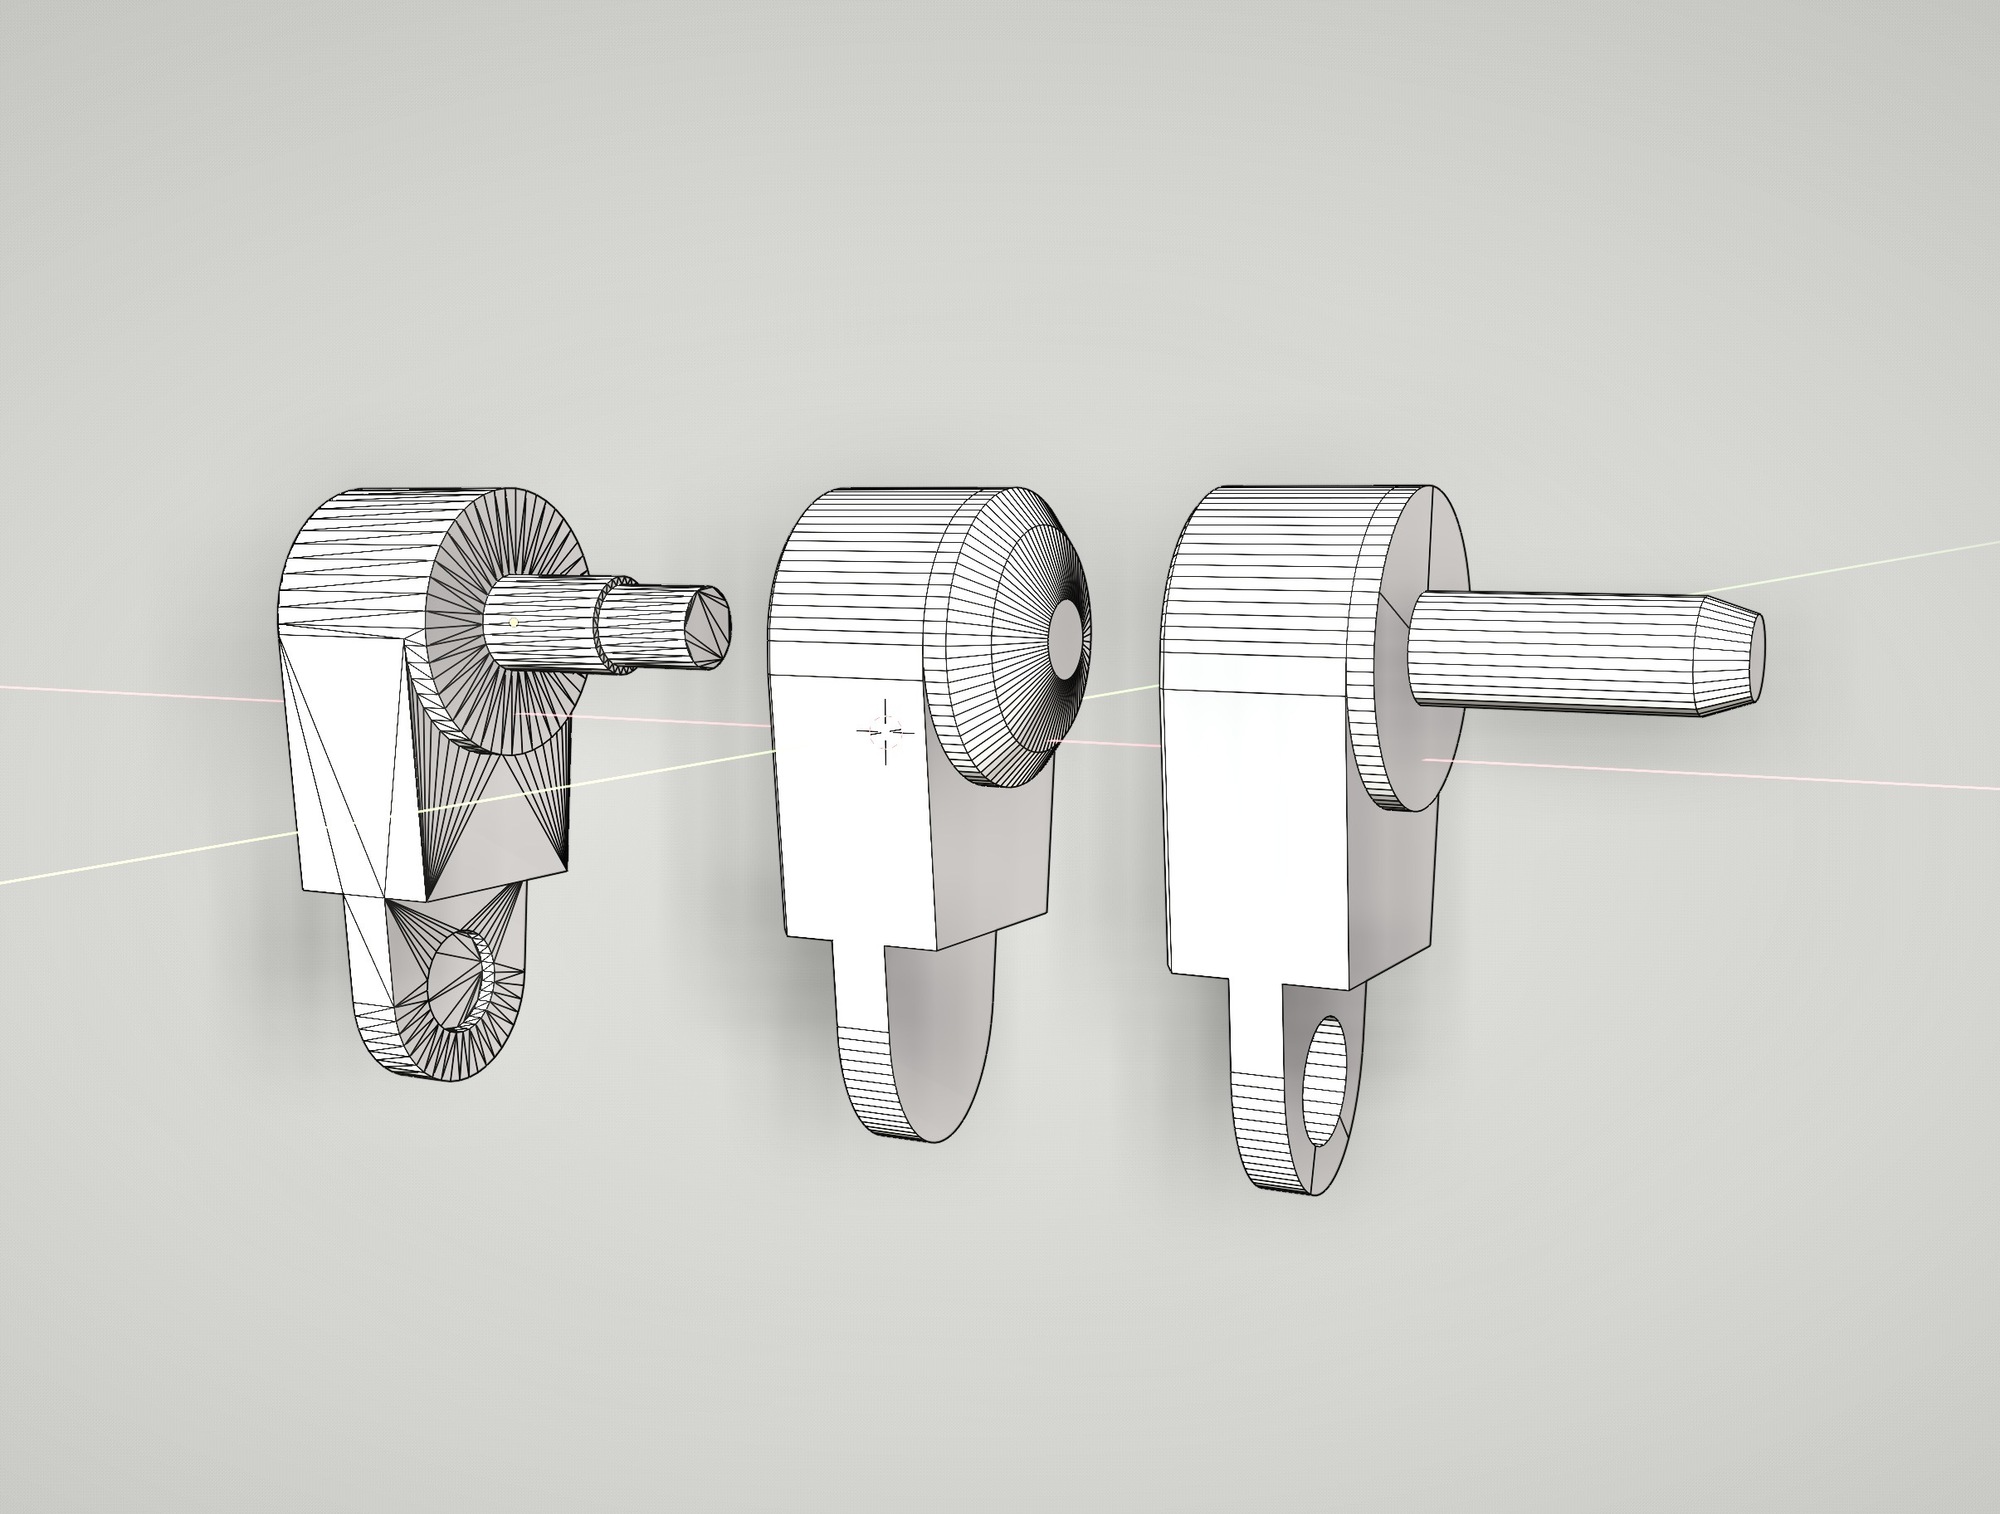
Later, when I actually wanted to have the figure roll out of the 3D printer, the models used for the animation again fell short on a few points. For example, the upper arms did not yet have the pivot pins, and the digital model of the hip section, which was simply attached to the lower body in the animation, also needed to be refined. The image above shows the model of the 'fischertechnik designer' of the upper arm, my own animation model and the 3D printable variant.
Since March 2010, Tilo Rust has been keeping us informed about the progress of the 'Großprojekt Seilbahn' in the FTC forum and articles in the ft:pedia magazine. After seeing the results achieved with the 3D printer, he posted a request on the forum. After all, it would be great if the fischertechnik model of the ropeway at the Bundesgartenschau Mannheim, the BUGA23 Mannheim, could be equipped with 3D printed figures. However, since the cable car is built on a scale of 1:10, the scale of the figures for these would have to be doubled.
My original offer to print some decorative dolls for the cable car project at 1:10 scale soon took an unexpected turn. Even before our first physical meeting at the Südconvention in Sinsheim in 2022, Tilo expressed his wish to surprise every member of his respected team with a personalized figure.
A great idea, but also quite a challenge because, in addition to clothing, especially the faces and hairstyle per figure should be as recognizable as possible. This meant that each member of the team would have to be crafted into a unique fischertechnik figure. The figures should be presented as a surprise during the festive presentation of the model in mid-June and absolute secrecy would be required until then.
Although the size of my possible contribution became clear fairly quickly, I was so enthusiastic that I immediately agreed to try and enlarge the 3D models to a scale of 1:10 and get started. At the Südconvention I was therefore already able to show Tilo, of course in the greatest secrecy, some premature trial limbs and (still undecorated) heads.
Naturally, photos were necessary to style the personal characteristics of each team member as well as possible. Tilo found a method to collect them without arousing suspicion. He started trying to collect the reference photos of each team member under the pretext that they were necessary for the access passes of the BUGA23 site.
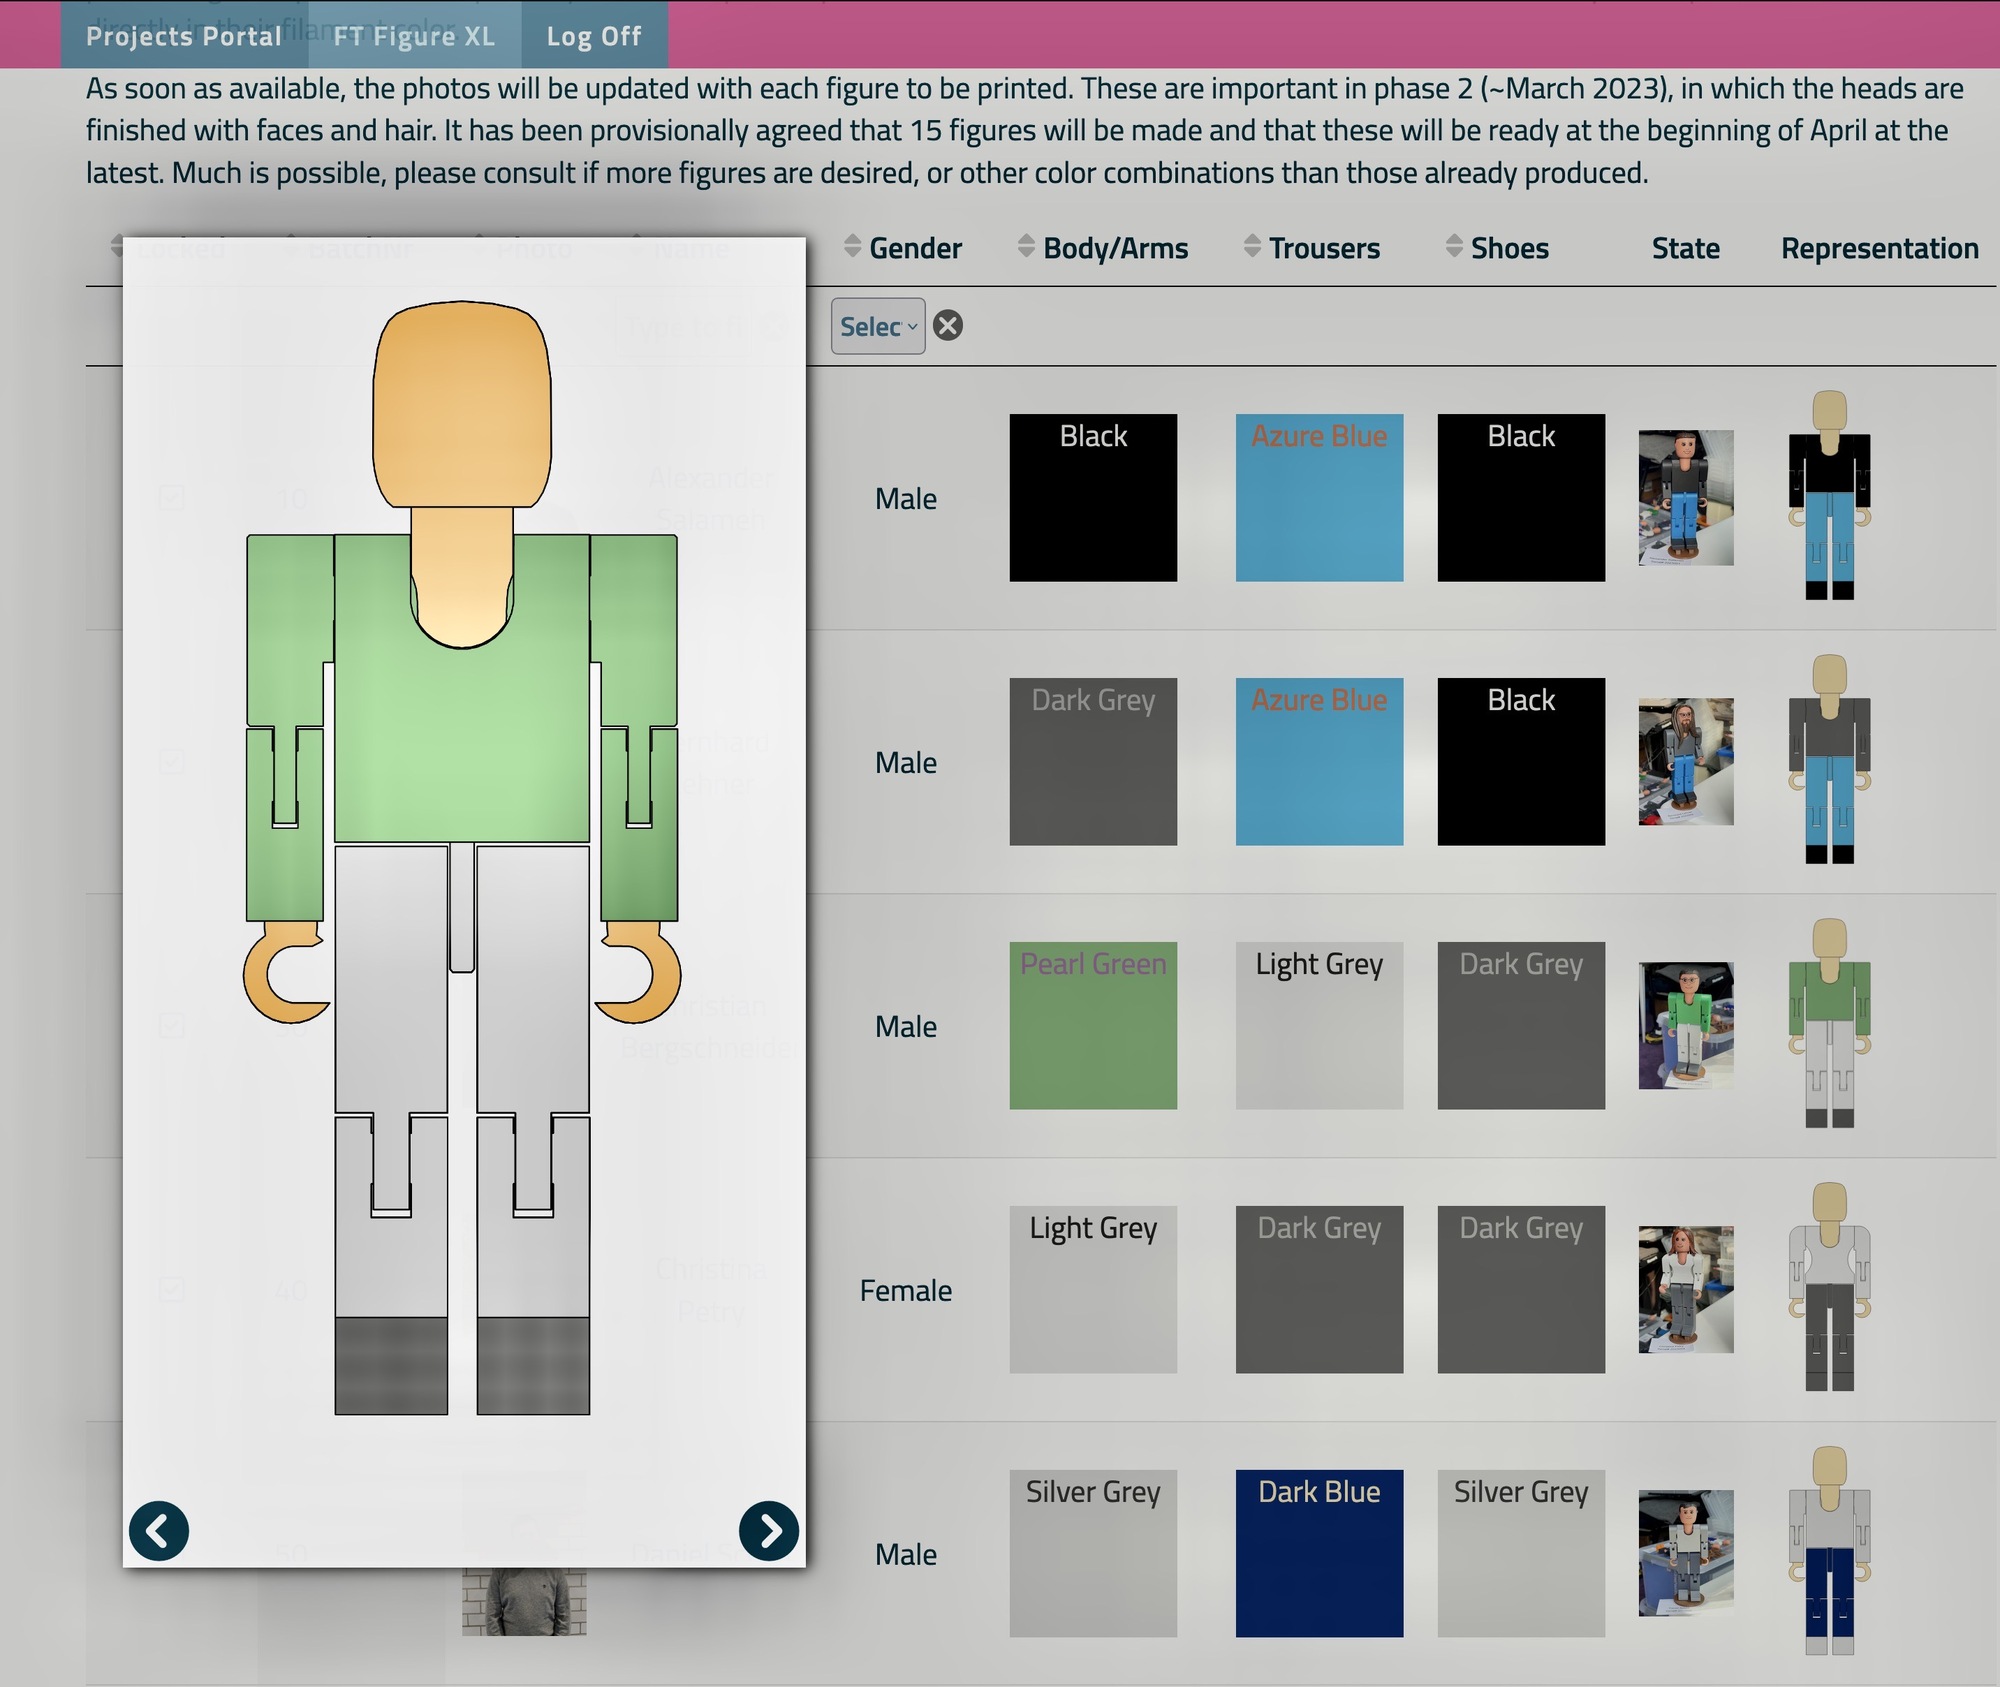
In the meantime I built a special project page for internal communication in a protected area behind my website. Here, the color configuration proposal could be crystallized for each member of the team and progress could be monitored. Naturally, this information was placed behind a password so that the surprise would not be disturbed prematurely. In the months that followed, Tilo made suggestions for the colors of the clothing and further specific personal characteristics of each figure, while I expanded my collection of color filaments for the 3D printer and improved the 'production printability' of the 3D models.
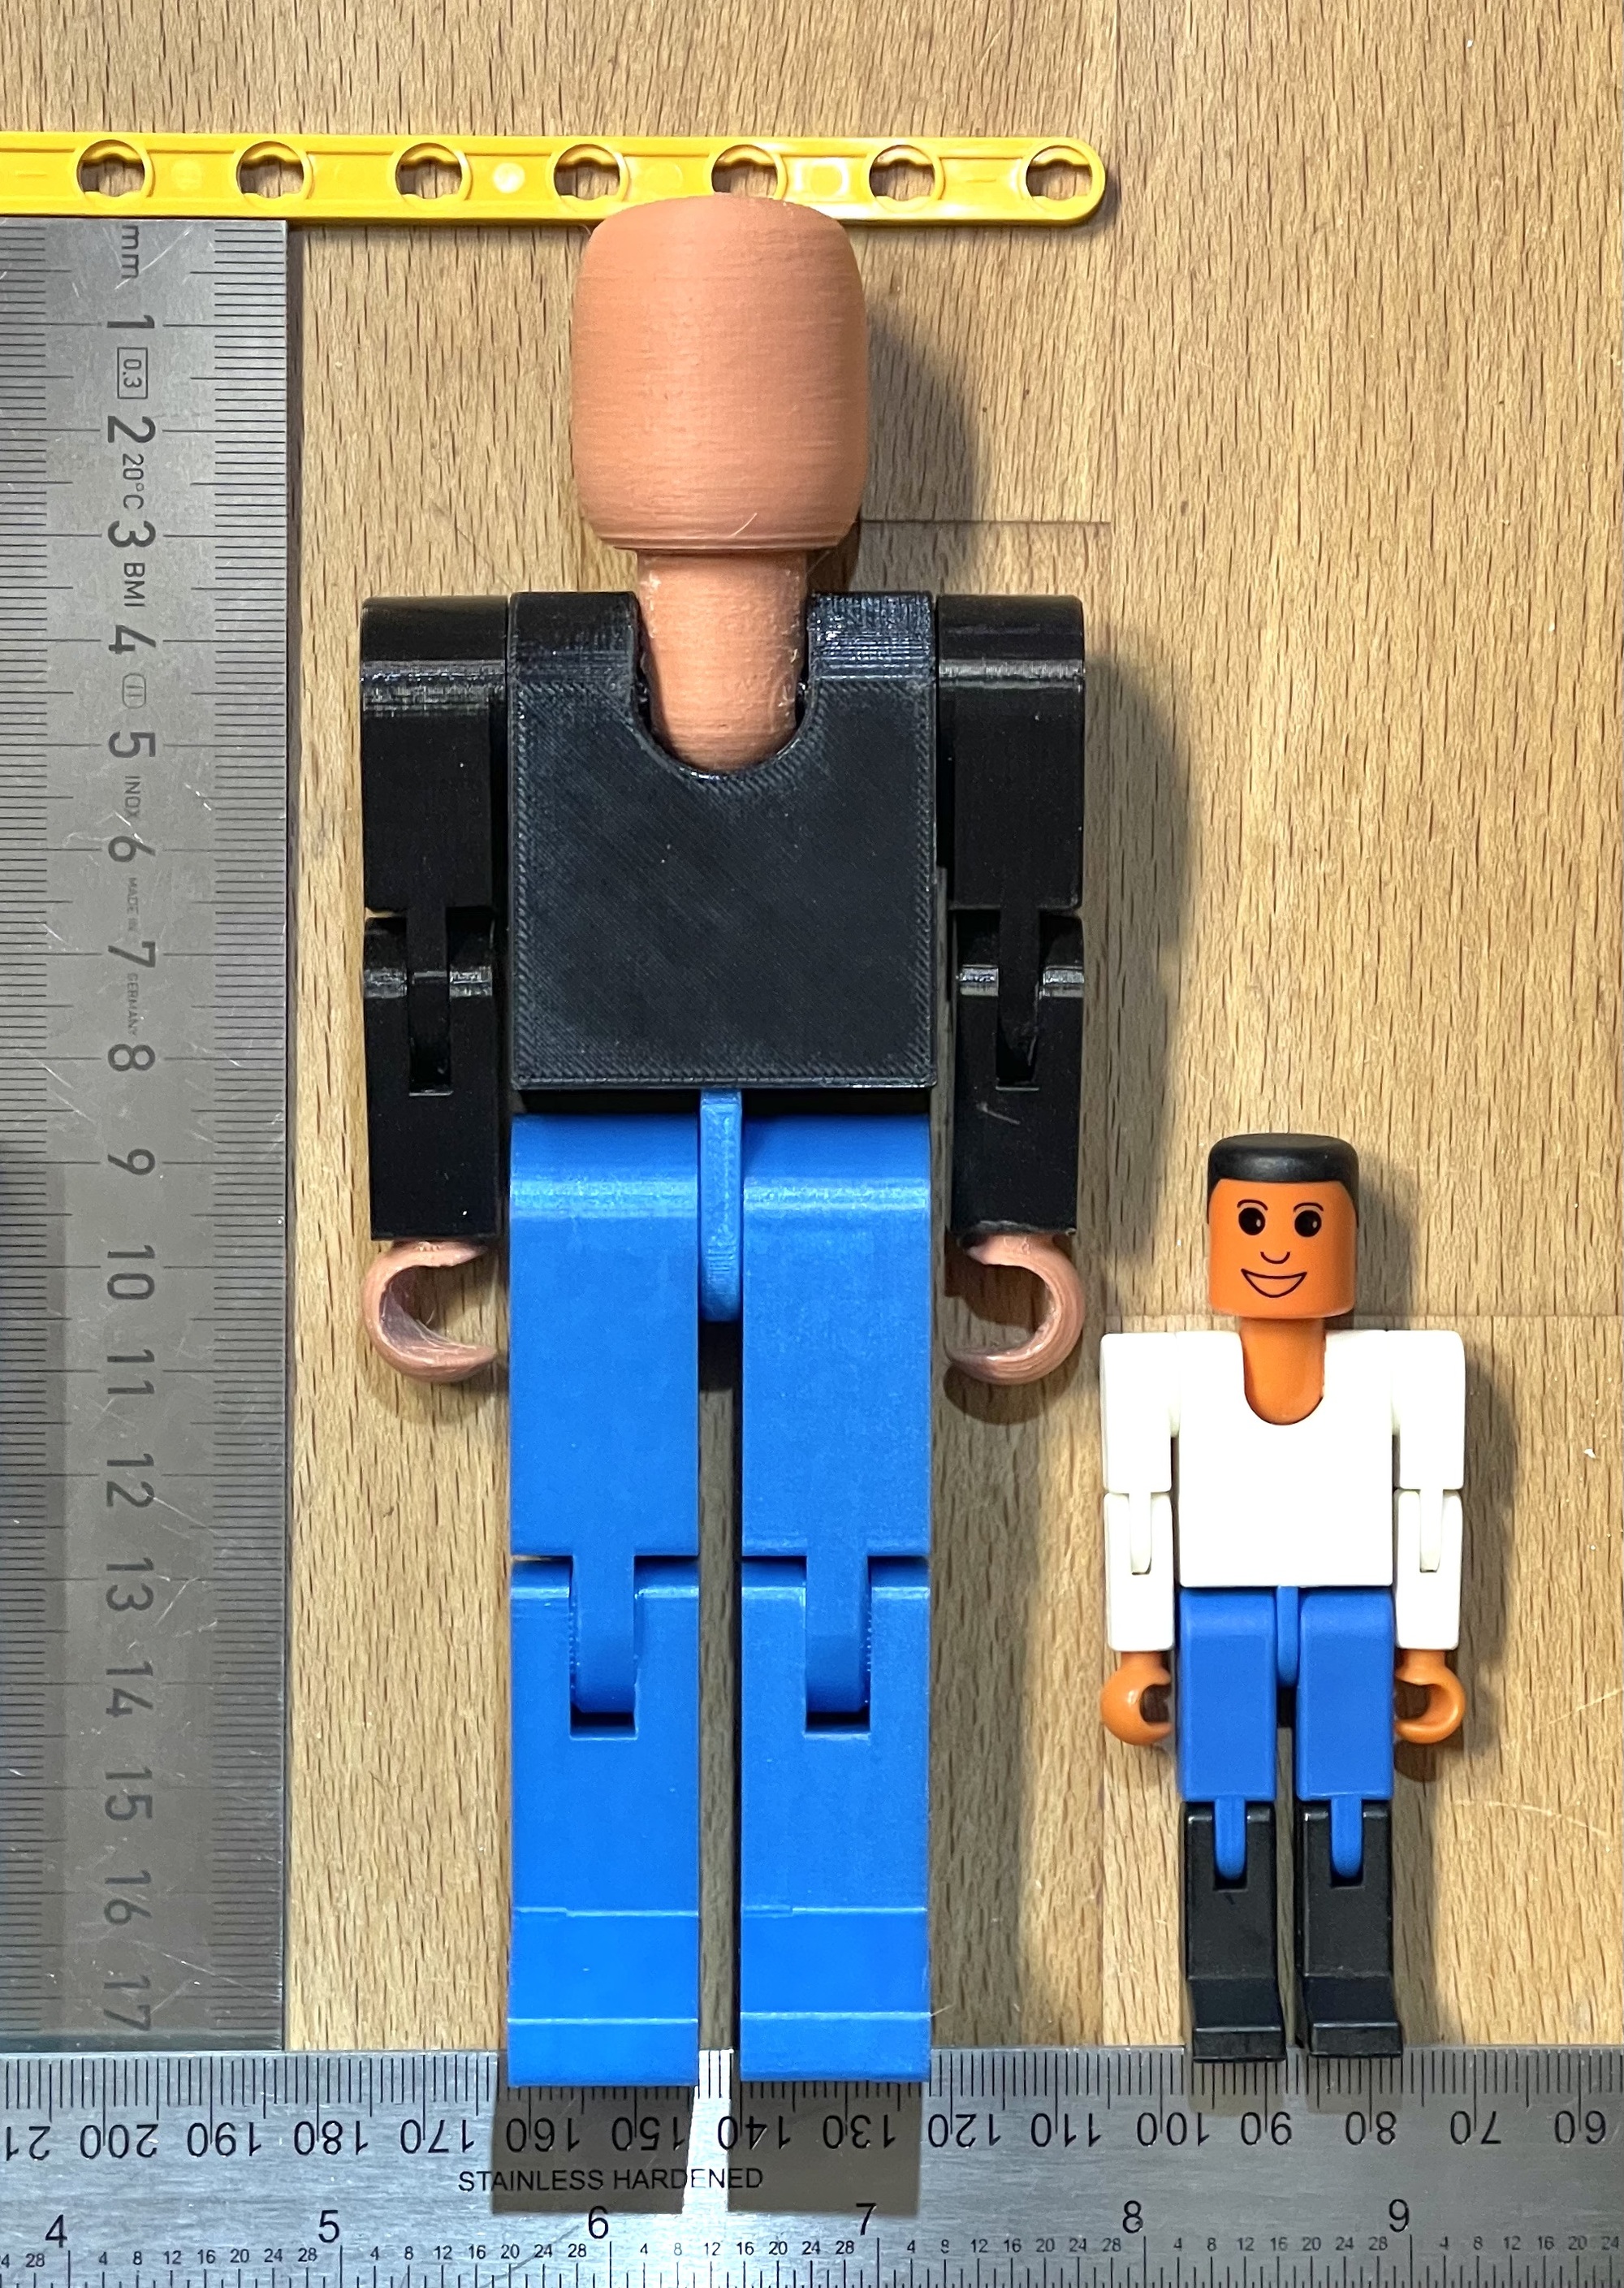
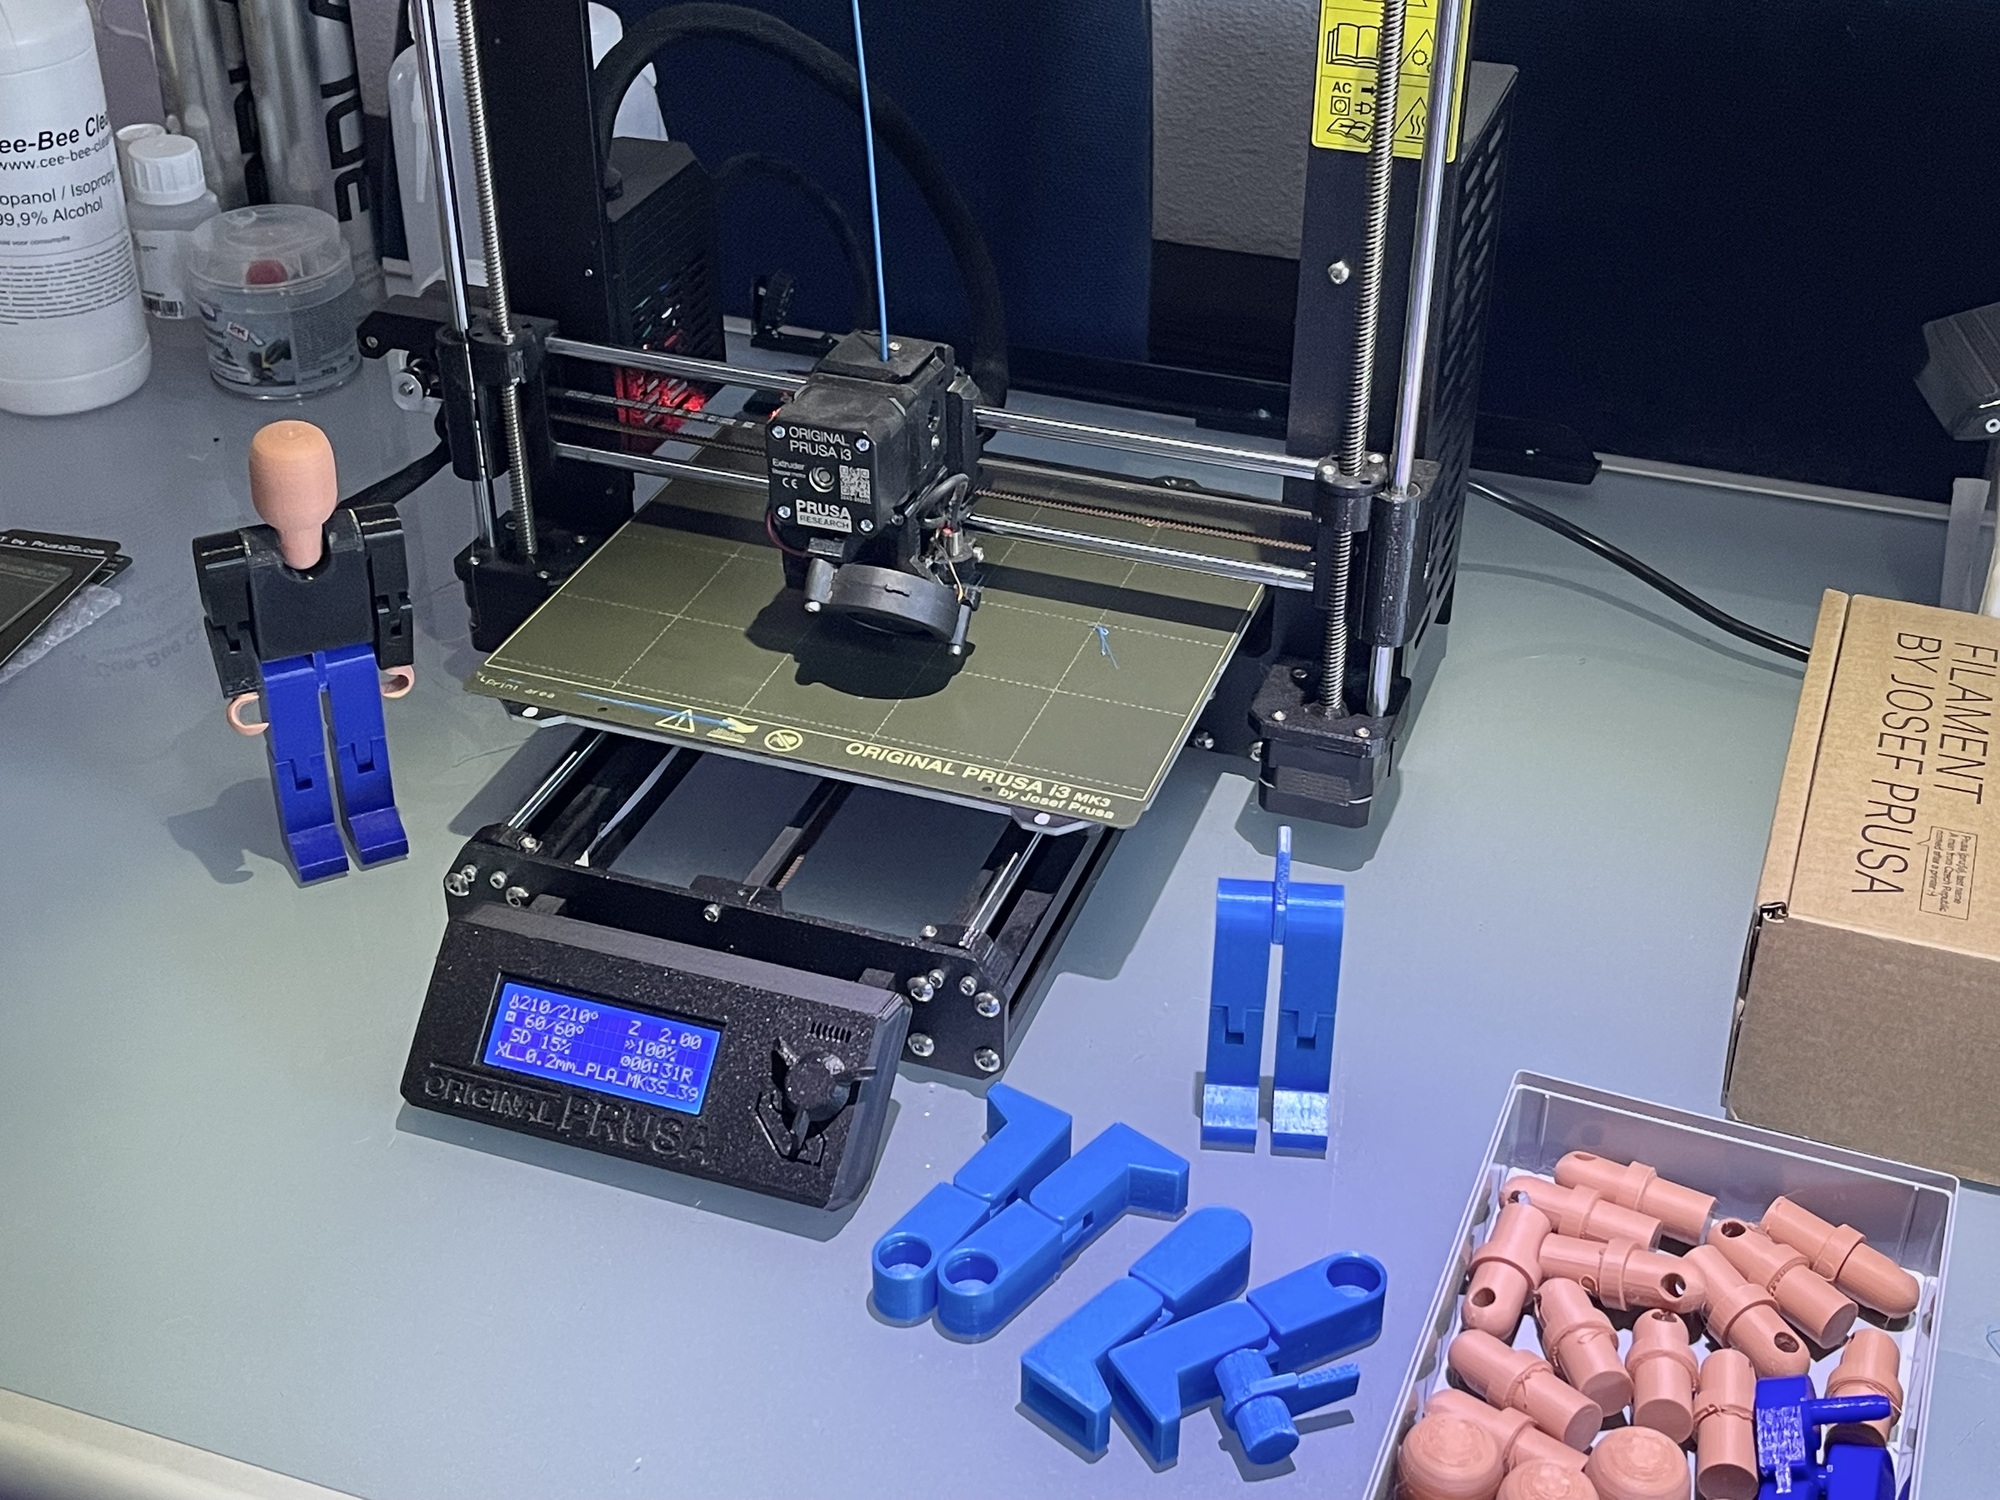
If all dimensions of the original fischertechnik figure are doubled, this leads to a 3D printable figure of 17 cm. high. All together it takes (my printer), without the manual post-processing, more than ten hours to print one such figure. It finally weighs about 85 grams.
Before printing the figures I tried different materials. PLA proved to be more useful than PETG. However, all available filaments are harder and more brittle than the plastic of the original fischertechnik figurines. As a result, the rotational resistance in the various 3D-printed 'joints' is different. To prevent the figure from collapsing under its own weight like a rag doll when 'posing', some experimentation had to be done with the diameters and shape of the pivot points. This was particularly important with combined printing (‘print-in-place’) of the lower and upper leg. A slightly oval pivot point was eventually created at the knee joint, and the pivot pin of the shoulder was given a rib on the shaft that could be roughened afterwards with a file if desired.
For the normal sized figures on a scale of 1:20 I had already printed some figures with hands and heads in other skin colors, or heads including a hairstyle. Of course, these heads had to be provided with a face afterwards. To keep the final figure recognizable as a fischertechnik figure, this face should ideally graphically match the stylized standard face of the original fischertechnik figure as much as possible. But applying such a face turned out to be not so easy.
Due to the layered structure of the 3D printed heads, I achieved few successful results with drawing with a marker. Due to capillary between the layers and the rough surface, sharp lines were hardly possible and the lines quickly ran (uncorrectable) out. Due to this surface structure, no sharp lines can be saved in the 3D print that can be washed in with paint afterwards, as is sometimes done with engraving. Here, too, the suction of the individual layers and the rough surface throw a spanner in the works. The result is blotchy and blurry. Engraving the faces with a laser is also not possible: the 3D filament understandably melts at a relatively low temperature and does not discolour to black. In the end I therefore painted the mouths and eyes of the earlier dolls on a scale of 1:20 with a very fine brush. Very labour-intensive and of course not very attractive in a small series production (about 20 unique dolls on a scale of 1:10) as I was now asked to do.
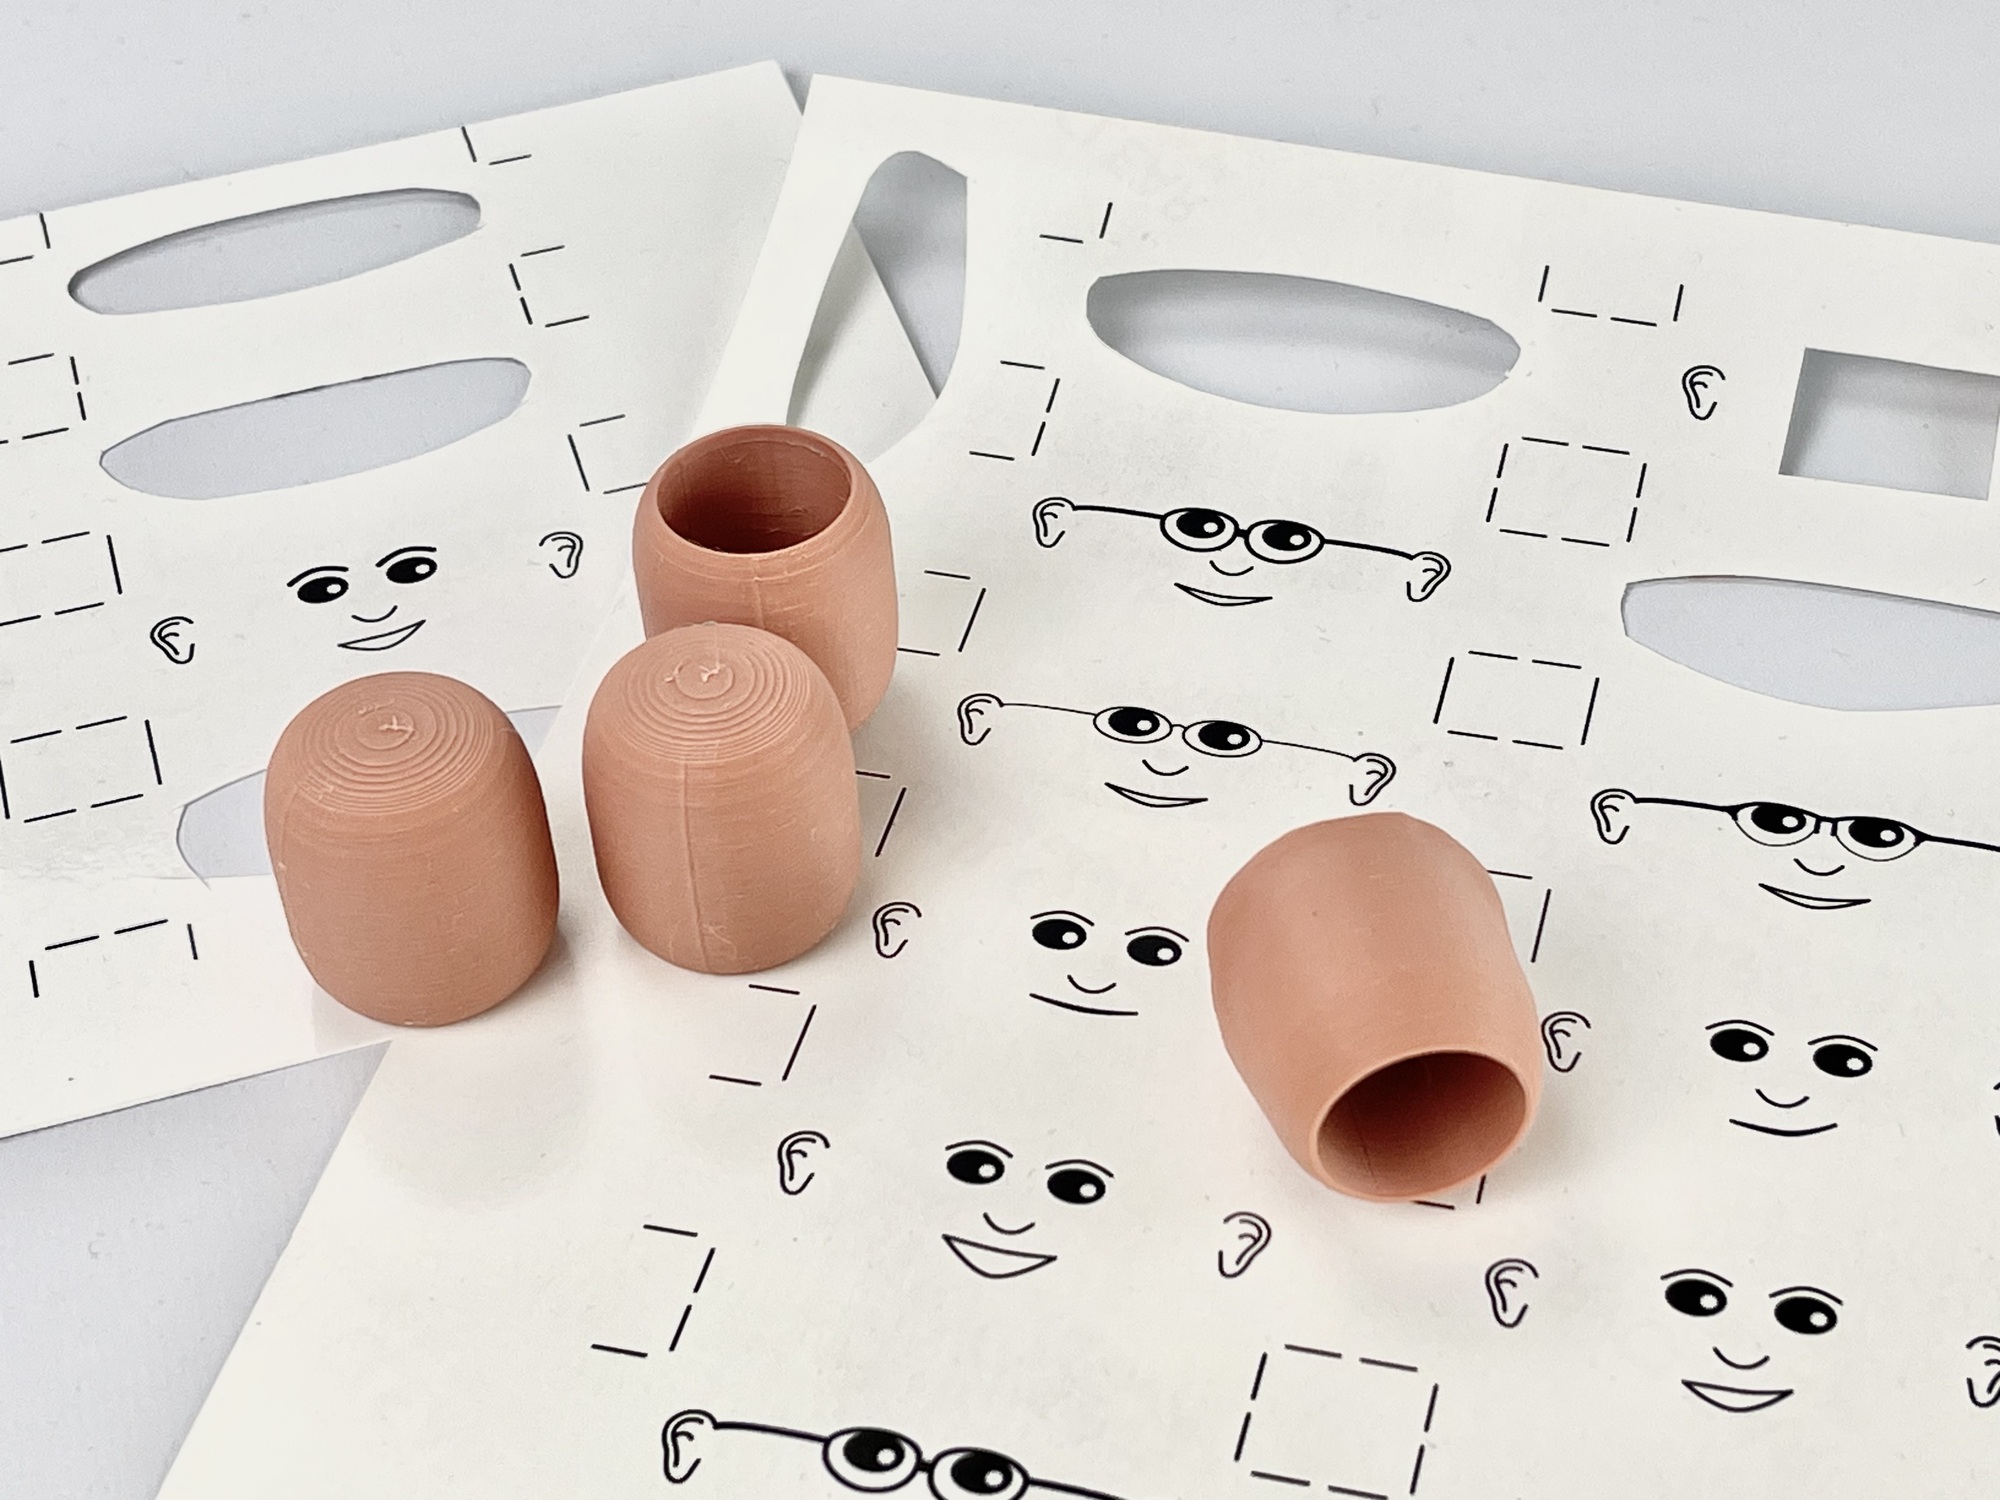
The best solution would be a solution in which faces printed with the laser printer could be transferred to the 3D printed heads. Because original fischertechnik dolls do not have glasses, beards and mustaches, etc., it was decided not to make them in 3D. Hair with volume could possibly become part of the 3D print of the head per figure.
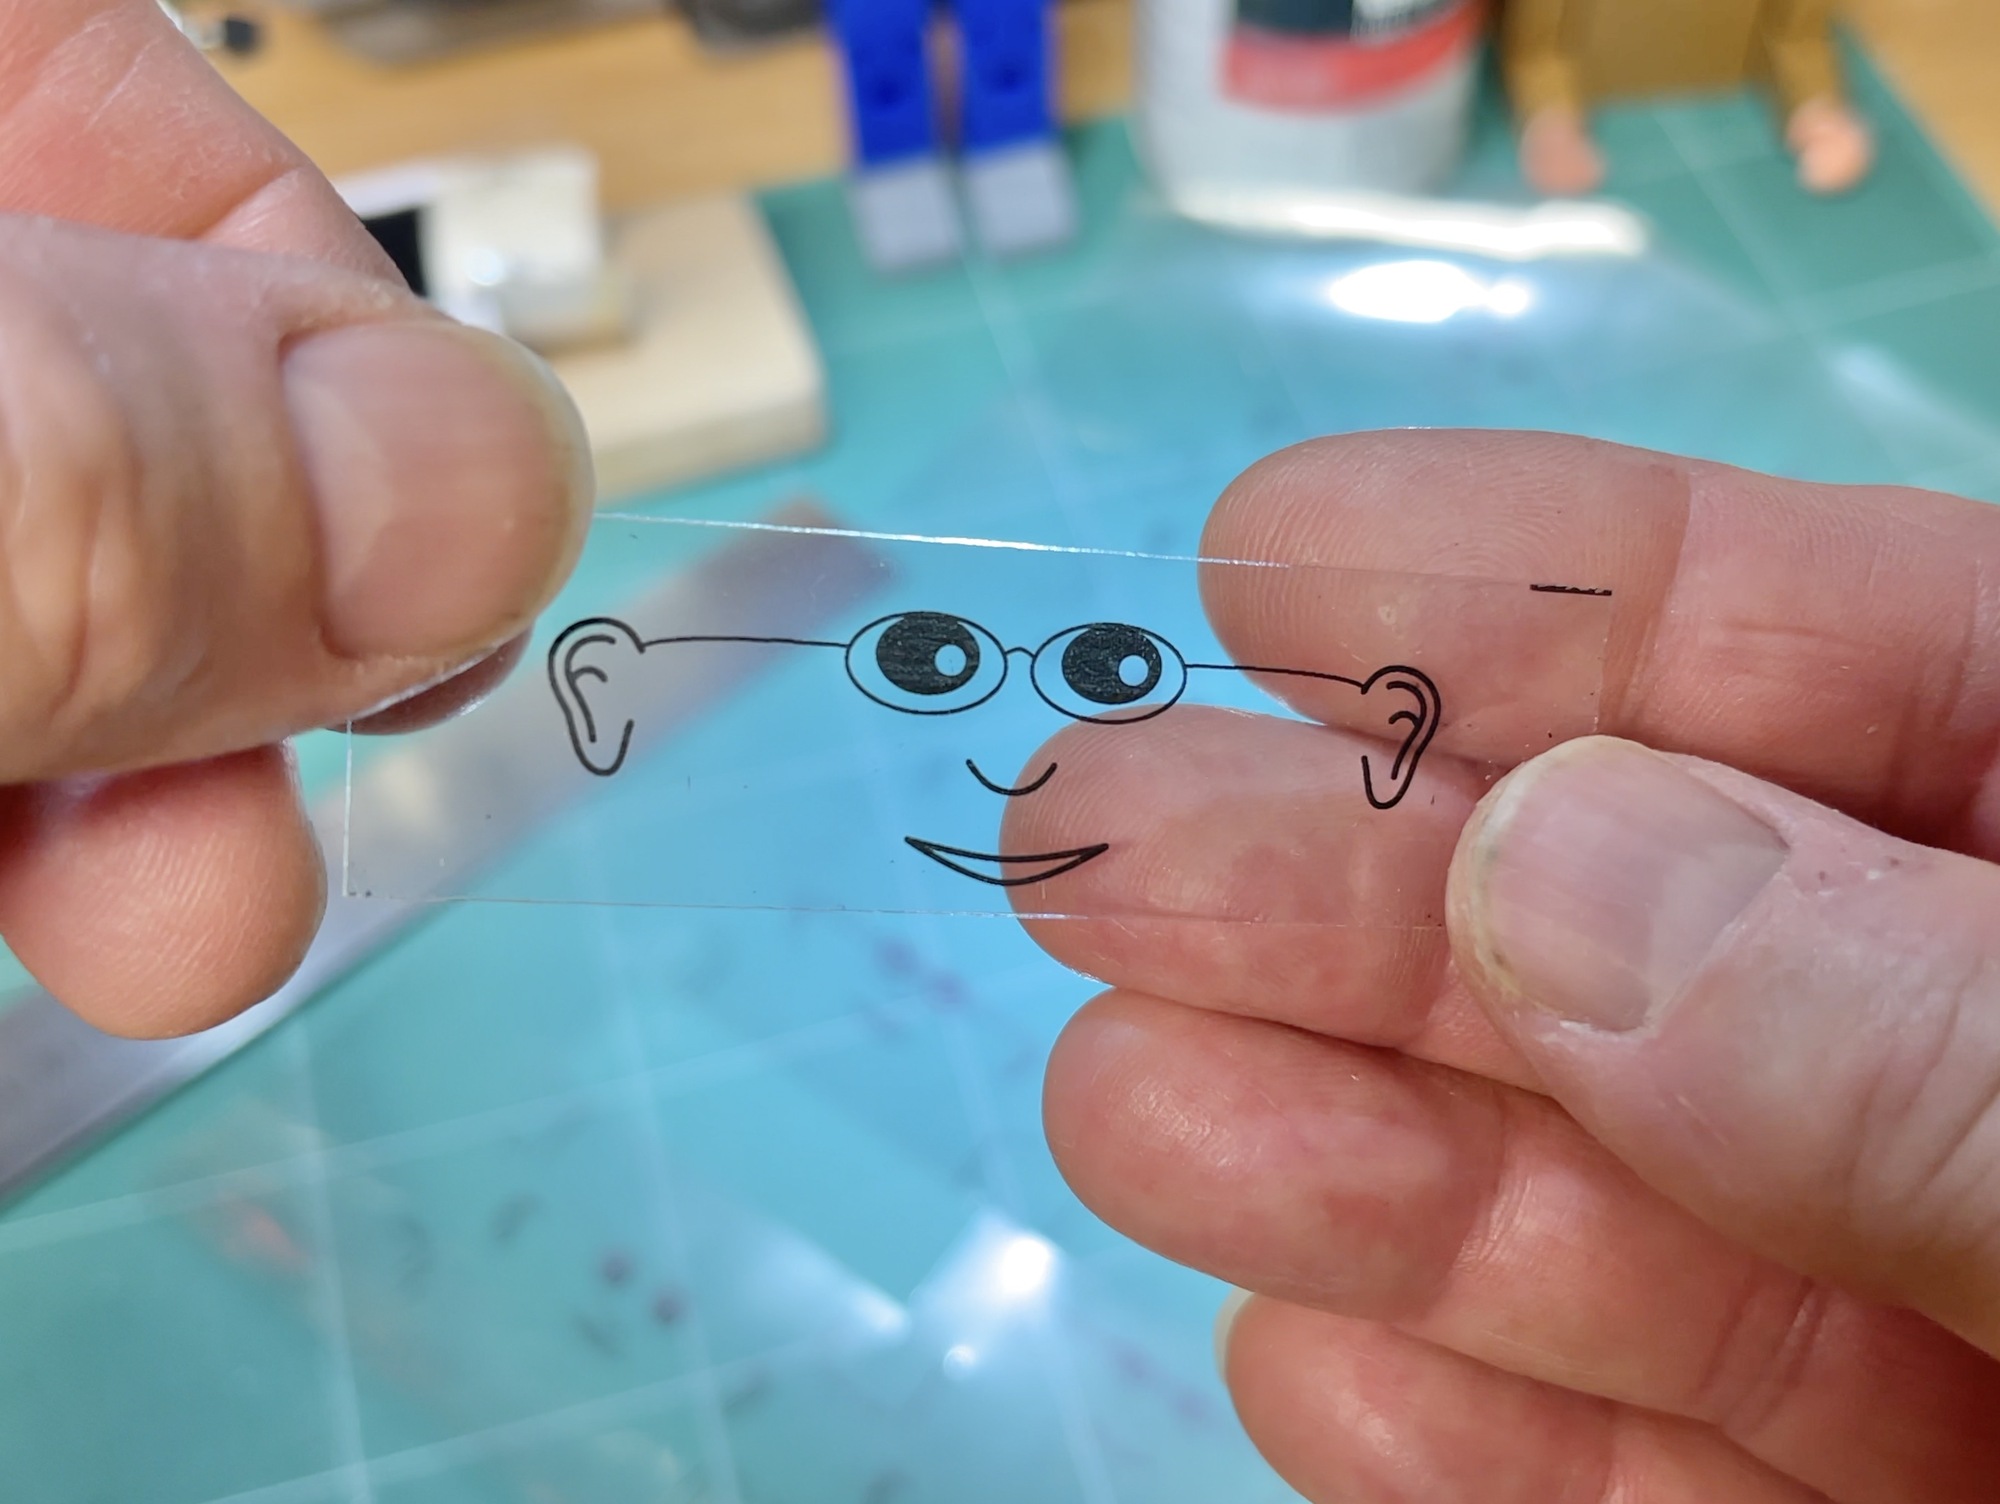
After printing bodies and limbs in the various agreed colors (per figure), I decided to experiment with applying 'the faces'. To this end, I brought stylized designs of the desired faces (without any facial hair, but with any glasses) together on one A4 sheet that could be printed on the laser printer.
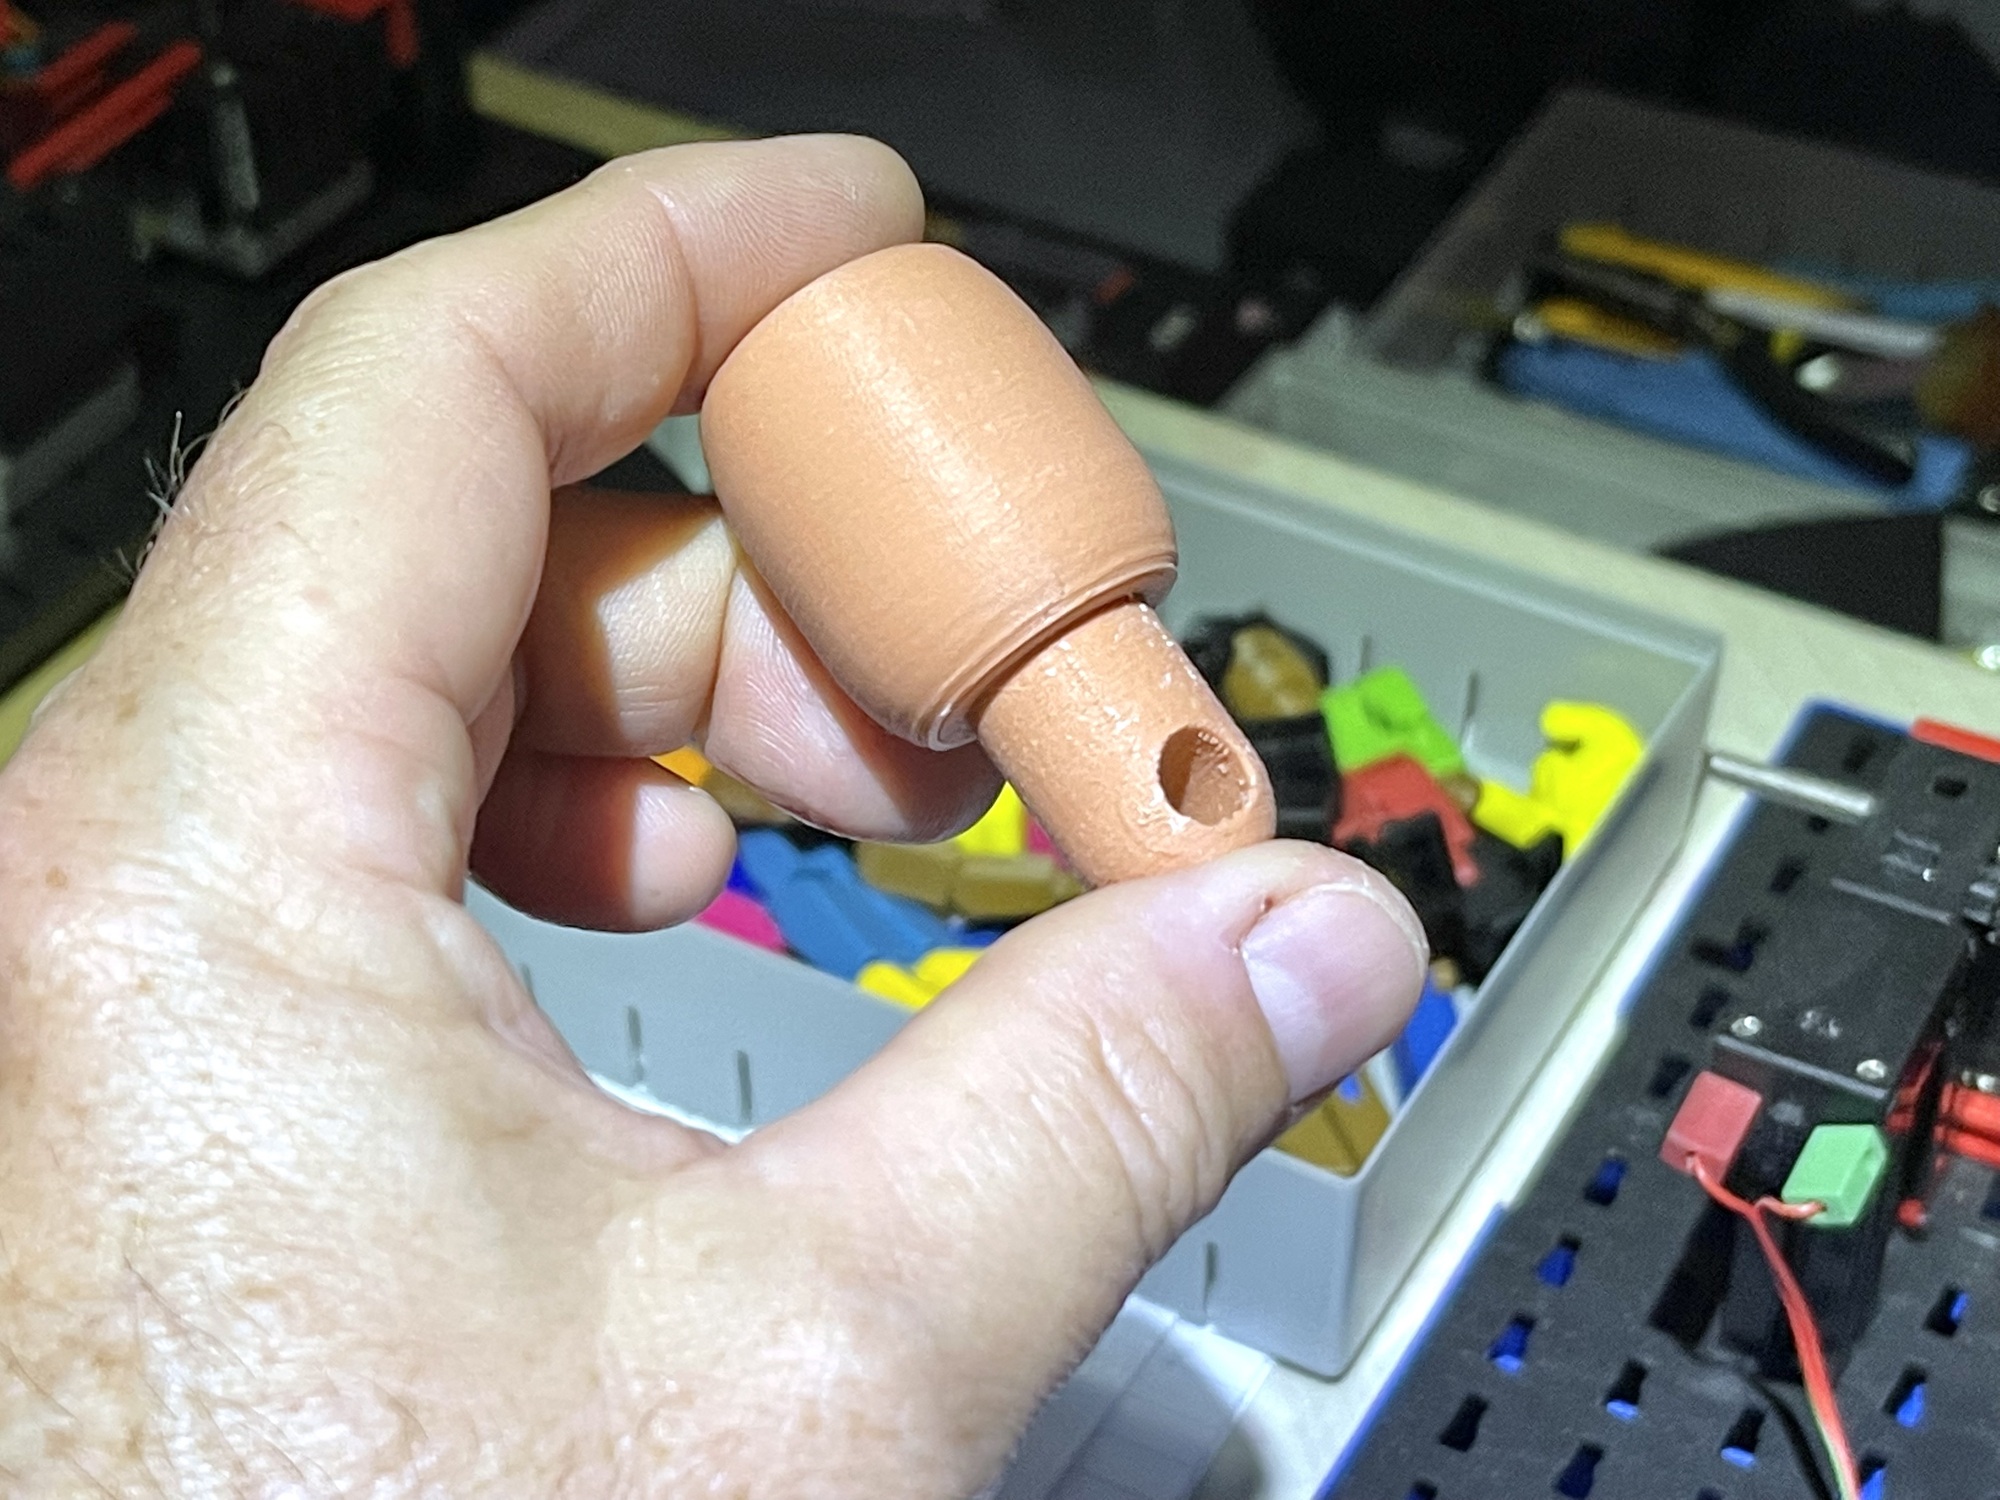
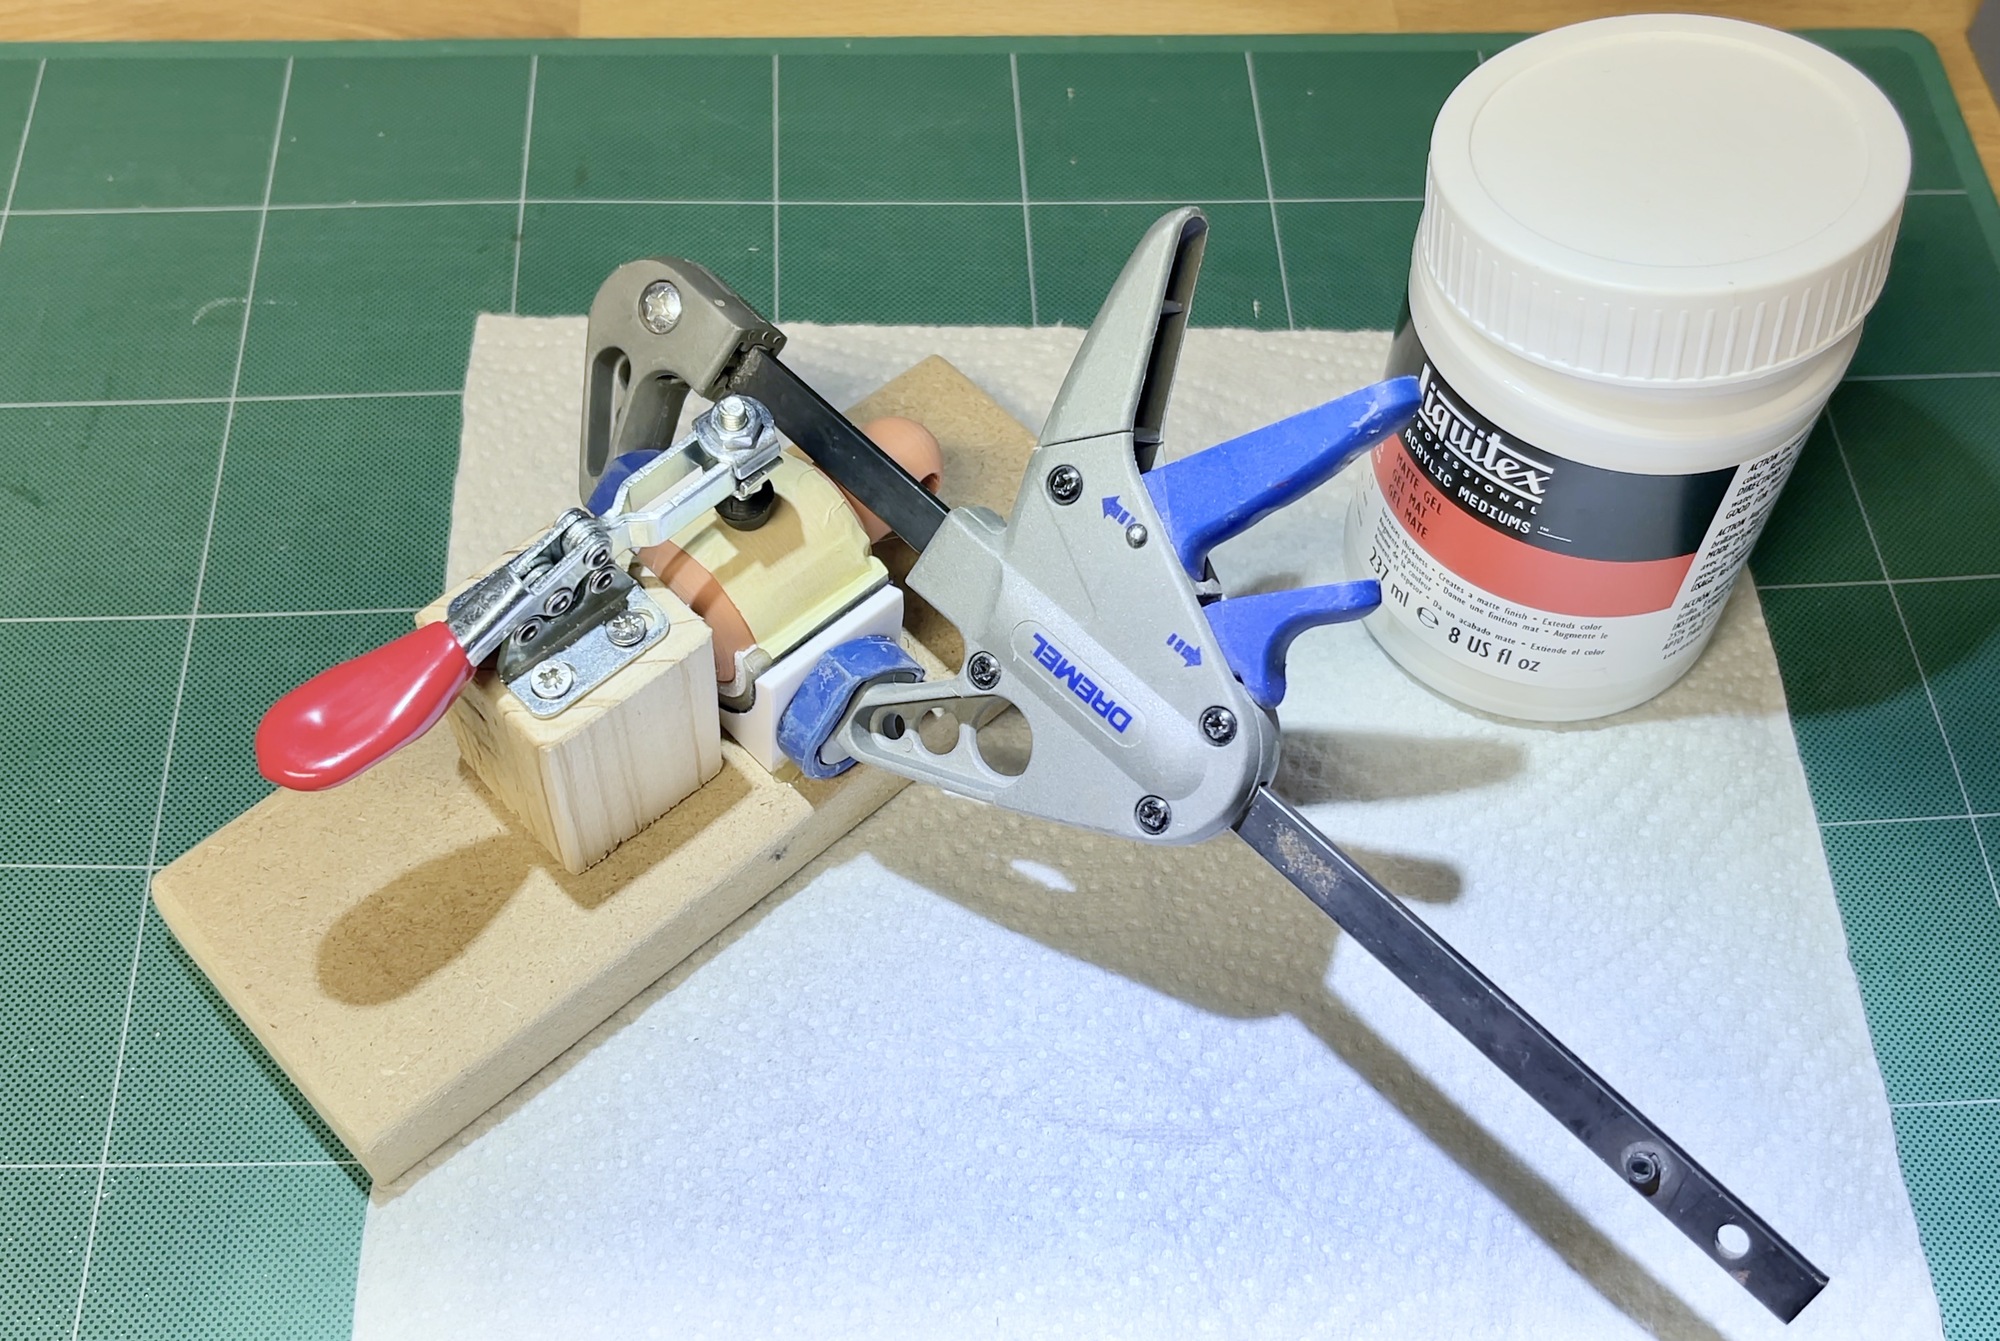
Guided by videos on YouTube, I first experimented with transferring the laser-printed 'face' via a gel medium. Ideally, this would only transfer the toner to the 3D head. Although I played around with various backing materials and papers (calque paper, plastic overhead sheet, and the waxy surface of the sticker backing sheet), and even developed the special clip of image 10 where, while drying, I held the image well on the circular head, I didn't get good results with this.
The best results can of course be achieved if the toner releases easily from the carrier. But positioning the image without damage becomes more difficult. In addition, the transparent transfer materials (such as overhead sheets), while facilitating positioning, were hardly permeable to air. As a result, drying took much too long and the risk of damage when removing the carrier quickly increased. This process therefore did not seem very suitable for the semi-series production required by the assignment.
Although the attempts to transfer the (toner of the) mirror-printed 'faces' to the heads with a gel medium had failed, a solution in which the faces could be designed in advance still seemed ideal. If the head, like the original part, were purely cylindrical, transparent sticker material could perhaps be a solution. However, the expectation was that this would not produce an attractive end result due to the gloss and thickness of the foil. In addition, it seemed to me that the adhesive of sticker material could 'sweat' and discolour over time. And maybe even the adhesion to 3D filament was not even sufficient in the long run, due to the stiff material around such a small diameter. This could literally cause loss of face.
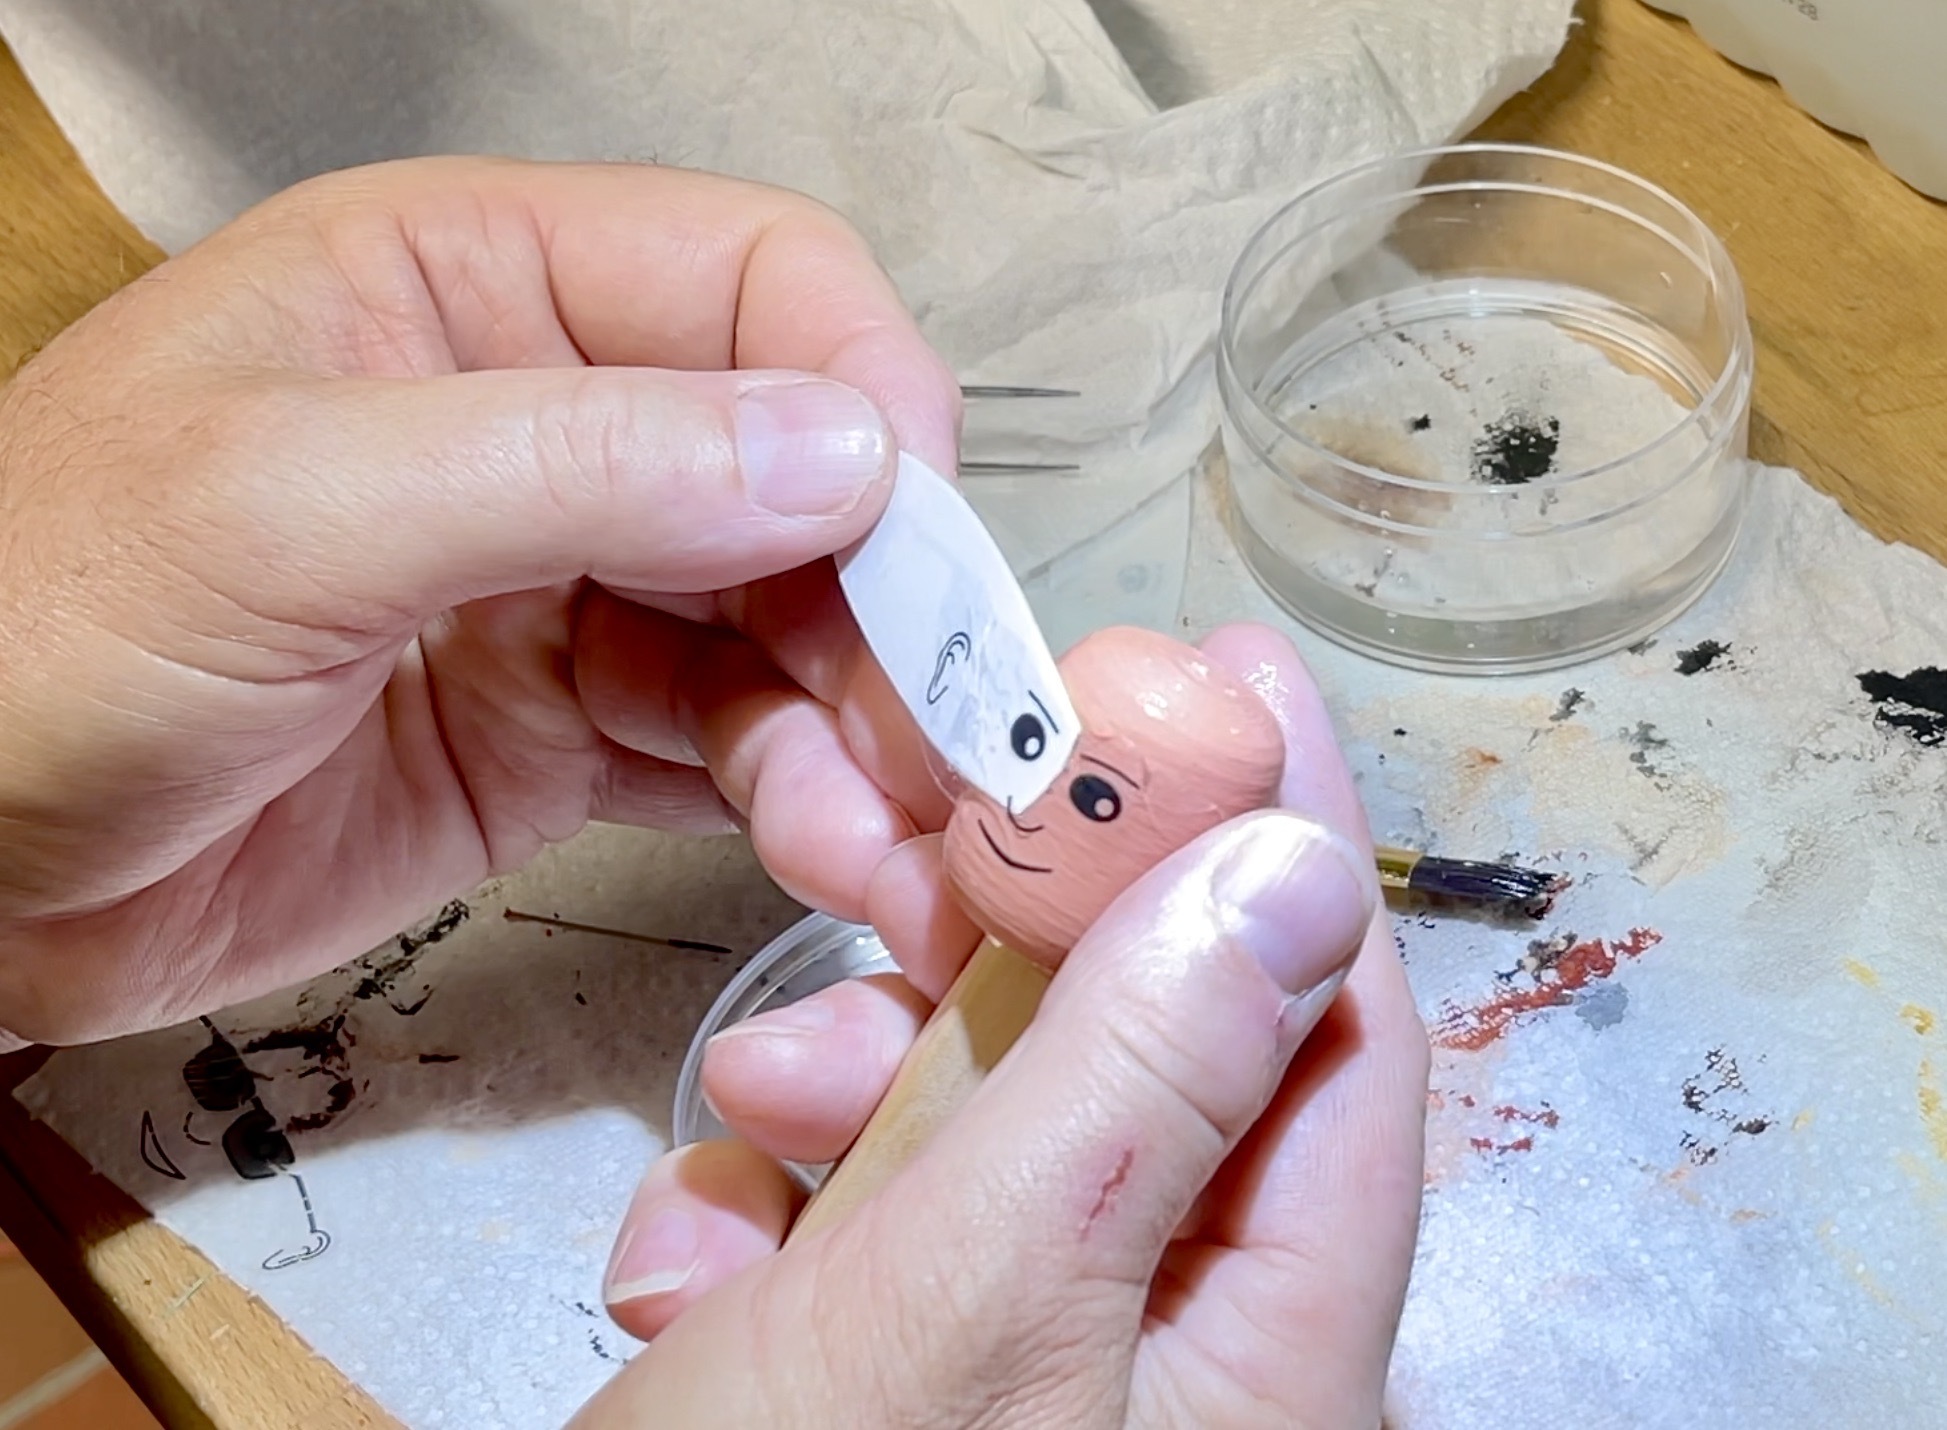
Then I remembered the 'transfers' that used to come with the plastic airplane kits. You cut them out and soaked them briefly in a saucer of water. After some time you could carefully slide the image from the paper onto the model. Due to the watery glue layer, the image was fairly easy to position for a short time. For model builders who wanted to make their own 'water slide decals', there appeared to be special paper for the laser printer (and even for the inkjet printer). These specially prepared sheets of paper consist of a water-permeable paper carrier layer on which a water-soluble glue and gelatinous top layer have been applied. You can print directly on the top layer in a normal laser printer.
I had already curved the original pure cylindrical head of the fischertechnik figure a little more at an earlier stage. The 3D-printed heads therefore had a slight curvature that could lead to small folds in the 'decal'. There is a special 'Softener' for sale in the trade with which the transfers can be made pliable. After some research in modeling forums, clear white vinegar also gave excellent results.
In the end, lightly priming the head with diluted gel medium and soaking the transfer in clear white vinegar instead of water proved to work best. Just before application, the surface can be additionally moistened to facilitate positioning. Some caution is required here because the printer toner is on the outside of the decal! The smoothing went, after some practice and with the necessary caution, fine with a brush with vinegar or water. After drying, the decals are firmly on the cup. Any damage to the image incurred during application can still be touched up with a pin with black acrylic paint (and a stable hand). Then the head is ready for the final step: hand painting of the hairstyle and any further facial hair.
Now that there was a useful method for applying the different faces, it was time to take a look at the different hairstyles of the figures. The hairstyles of the different people naturally varied considerably and the conclusion had to be drawn that the originally designed head could only be used for the people with very little (or no) hair on the head. In the team, on the other hand, there were several people with very pronounced and voluminous hairstyles. Just painted on a flat 'head', these hairstyles probably wouldn't be very recognizable or believable.
Because the final figures on a scale of 1:10 had to be aligned as much as possible with the existing, stylized, fischertechnik figure, sticking on wire, felt or cotton wool as hair was actually not an option. Loose 3D printed 'wigs' quickly become very thin and are difficult to print. The conclusion was that for these hairstyles it would be better to make a '3D custom head' with extra volume for the hair. For some (male) figures, a 'universal' model that could be sufficiently personalized with the correct final painting was sufficient, but the heads of three people should already be uniquely shaped in the 3D phase. Naturally, the design had to take into account that long locks of hair fell over the shoulders after assembly of the entire figure.
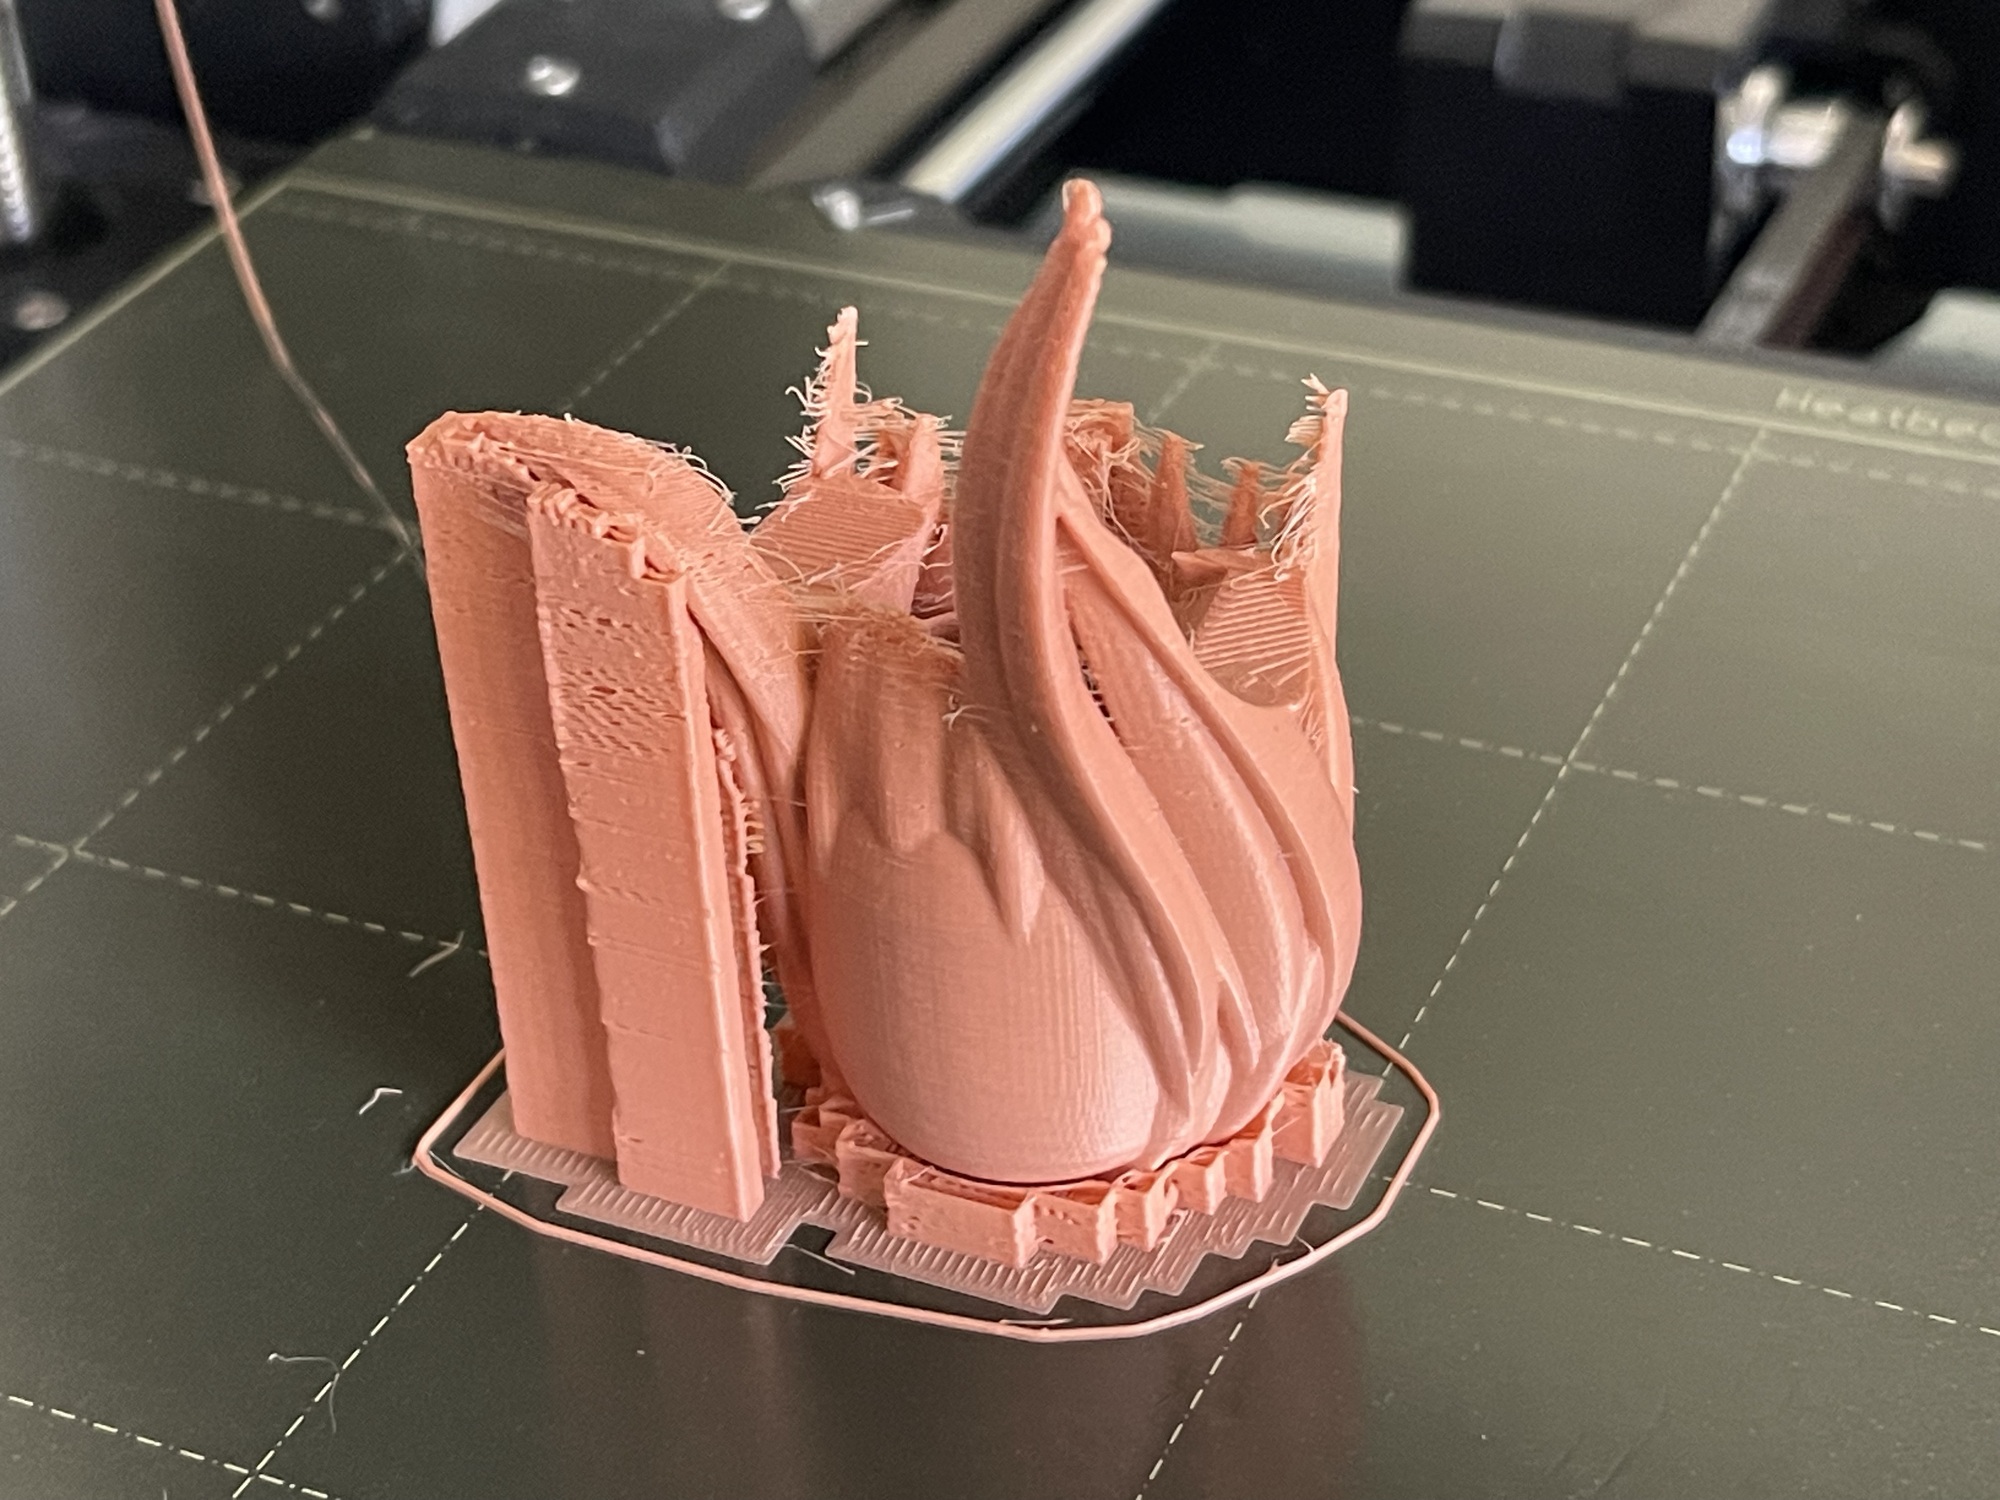
On the print bed of a 3D printer only flat surfaces can be printed. Curved or round surfaces are printed with a support structure that can be removed later. These surfaces require reworking and usually do not become so smooth. The custom-made heads could often be printed upside down with such support constructions. Some figures wear caps. I printed this without a support construction, flat on the print bed. I obtained the curved valve by carefully heating the 'flat valve' afterwards with a small piezo burner and then reshaping it by hand. In retrospect, this technique could also have been used to create curved hair strands, for example.
After hand-decoration of the hair and any further facial hair such as beard and moustache, the figures could be assembled. Afterwards, each figure was sprayed with a matte transparent varnish. This fixed the hand paintings and eliminated possible gloss differences of the various materials used.
As already described above, 3D filament is more brittle and harder than the plastic from which the original fischertechnik figures are made. This was already taken into account in the design, but sometimes limbs still moved too smoothly. Usually applying a small amount of contact adhesive in the back of the knee, or in the openings for the arms in the neck, was enough to regain enough 'posing power'. To temporarily pose the dolls in and around the Seilbahn model on the BUGA32 I gave them small footrests. Eventually the model will be on permanent display in the Fördertechnik Museum in Sinsheim. From that moment on, the figures can of course be placed and attached more permanently.

On Saturday, June 8, it was finally time. During the announced 'Gondola Gala' on the BUGA32, the figures would be presented to the members of the team present. Despite the high temperatures that day, various interested parties and sponsors had found their way to the presentation hall in Luisenpark. After an introduction by Tilo and a few key notes from sponsors (including fischertechnik, Doppelmayr-Garaventa and the Fördertechnik Museum), Tilo was appropriately thanked by his team.
After that, the small figures could finally be adopted by their large image. The surprise of this was of course great. The photo on the left shows project leader Tilo Rust with his small counterpart.
The video I made summarizes the challenges I faced. The project provided unique opportunities to experiment with large-sized fischertechnik figures. With 200+ hours of printing and at least 50 hours of manual decorating, it was quite a challenge, but a lot of fun to do. Various problems were gradually overcome and the solution for the personalized hairstyles and the application of the faces is ultimately very useful.
As I overcame each challenge, I saw the figures and the "family" grow. We will consider it a coincidence that the lead time of the project from conception (idea) to birth (the 'Gondel Gala') of these unique figures took nine months. By visiting a few fischertechnik meetings, I got to know various team members during this period. Needless to say, I struggled several times to keep the secret until the final 'Gondola Gala'.
The figures produced are without a doubt a unique gift. In the future I will certainly take up the design of personalized fischertechnik figures more often. However, these figures will first have to work hard on the BUGA32 before they can enjoy a quiet old age in Sinsheim at the permanent arrangement of the cable car.