The Retrophone is a “telephone switchboard” to which you can connect a classic “landline” telephone. When you pick up the receiver, you will hear a dial tone. After dialing a phone number, one of the hundred audio clips on the memory card will play. With the dialed numbers, any of the up to ten audio clips in up to ten folders on the memory card can be played.
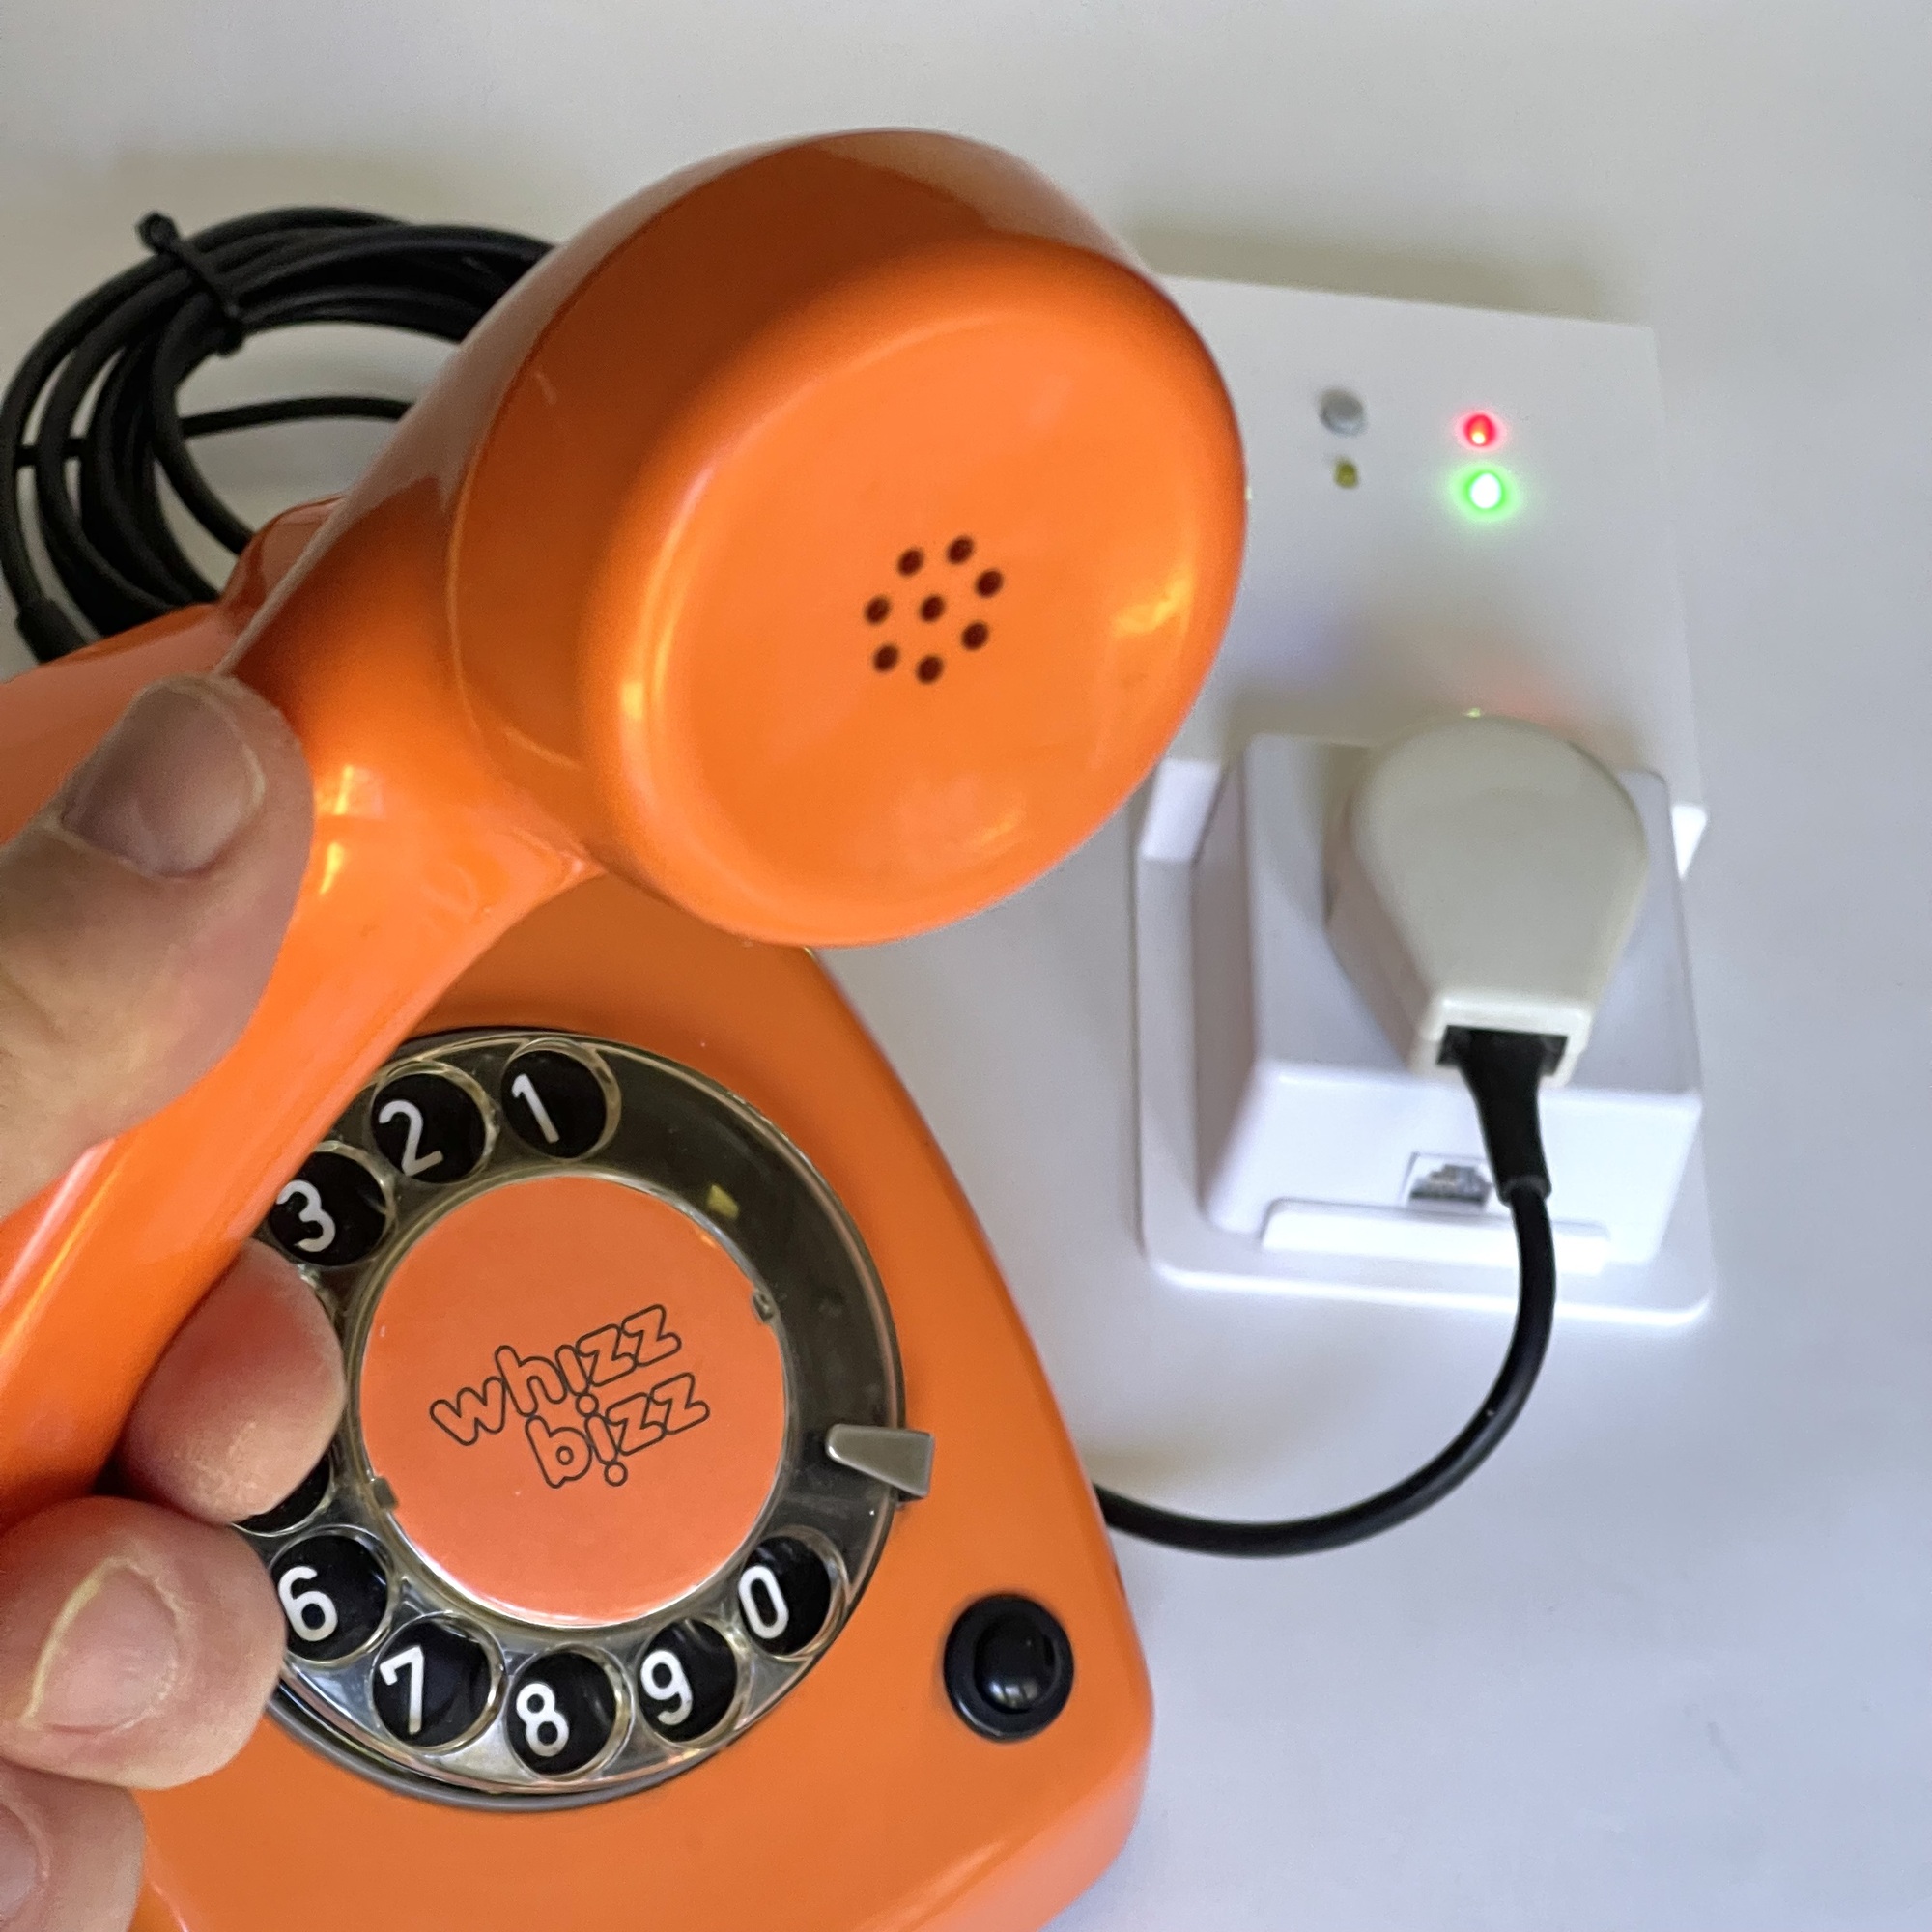
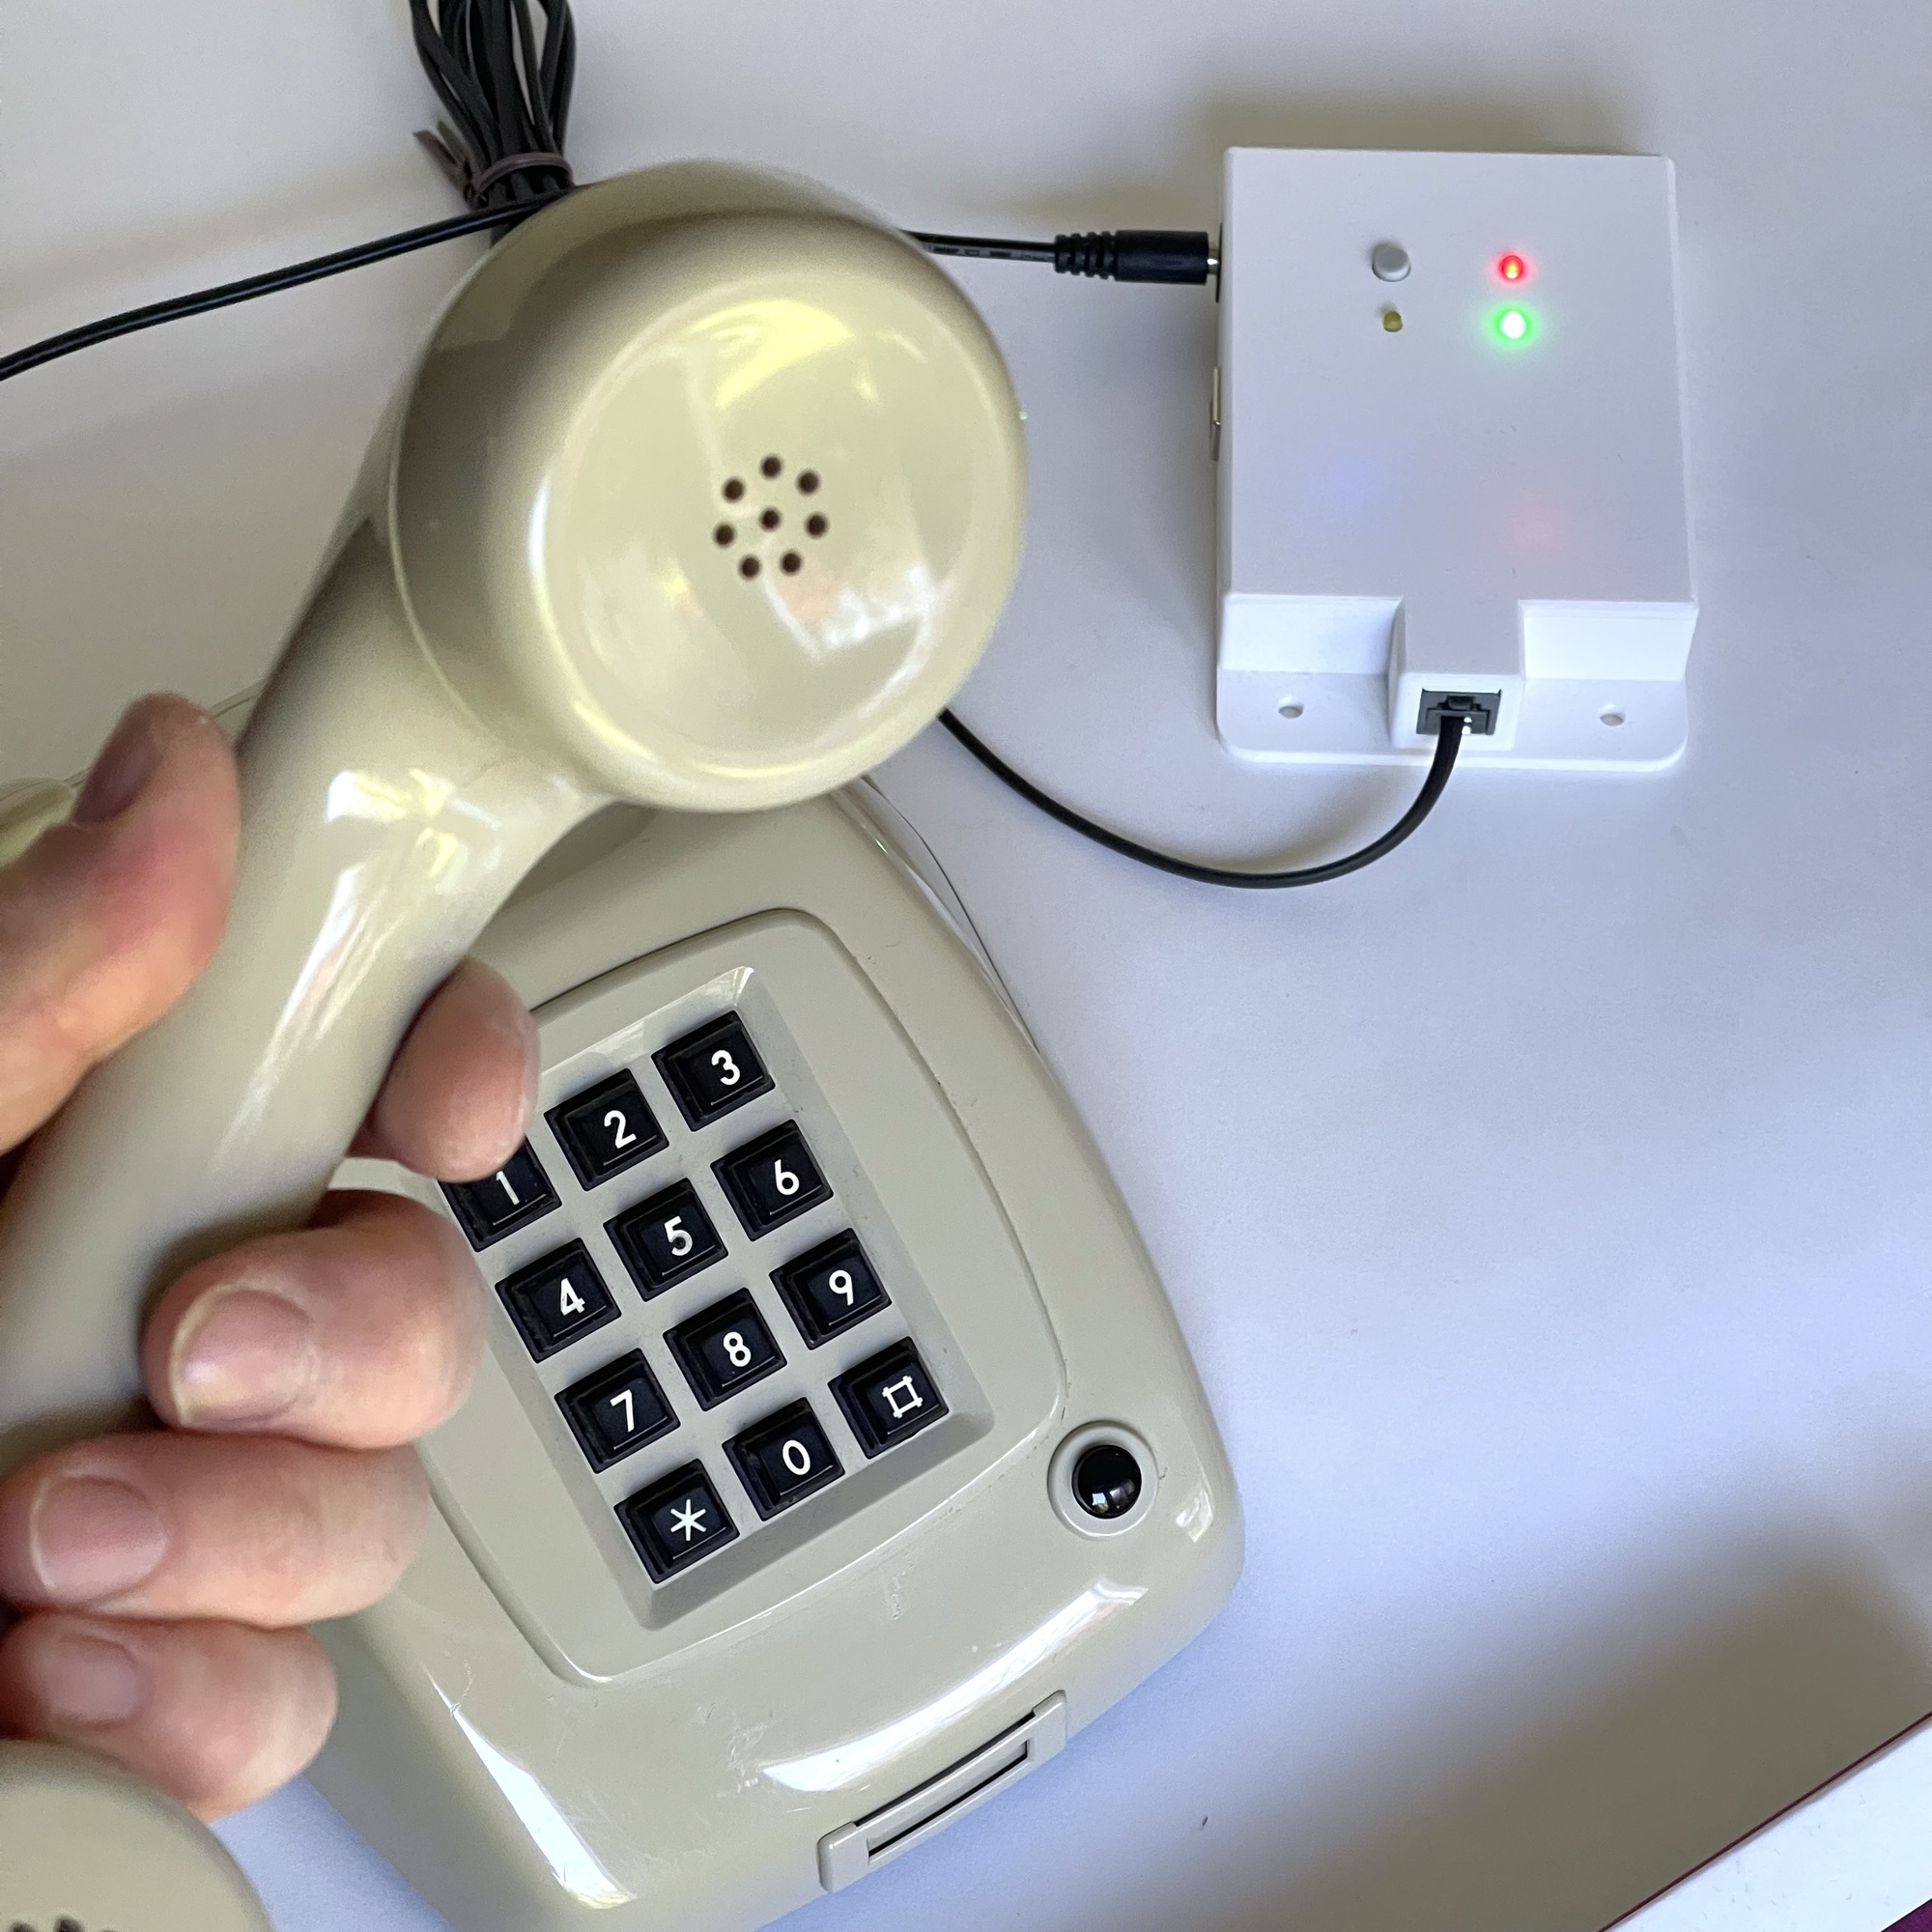
No modifications are required for the phone to be used. Depending on the Retrophone model, rotary-dial phones (IDK) and/or push-button phones (TDK) can be used. Depending on the version, a classic phone can be connected using the traditional Dutch PTT plug, while a modern phone can be connected using a modular RJ11 plug.
The Retrophone is powered by a 9-volt DC power adapter. Only models with a 5.5 mm pin diameter and a 2.5 mm hole (for the positive terminal) can be used. If the power adapter is not included, please check that your power adapter is compatible before using it! The technical specifications are listed on the back of the Retrophone.
The power adapter is connected to the side of the Retrophone. Here you will also find (optionally) the USB port for accessing the memory card, and a slot for removing the memory card. Detailed information about the memory card’s file structure can be found later in this manual.
The manual and instructions on this page can also be downloaded as an easy-to-print PDF document: Retrophone User Manual. DIY enthusiasts and tinkerers please refer to the page with DIY instructions.
Once the power adapter and phone are connected, and a microSD memory card is inserted, the Retrophone can be turned on using the power switch on the front.
The colored lights (LEDs) will all light up simultaneously for a moment. When only the red light next to the power switch is lit, the Retrophone is ready for use.
The Retrophone includes an audio player (MP3-TF-16P, also known as the DFPlayer Mini) that allows audio files to be played directly from a microSD card (also known as a TF card). This memory card must be formatted with the MS-DOS or ExFAT file system. Memory cards with a maximum storage capacity of 32 GB can be used. However, for most applications, microSD cards with a smaller storage capacity (e.g., 8 GB) are usually more than sufficient.
The file format and naming convention for the audio files on the memory card are straightforward. In addition to a few audio files at the root level, the memory card may contain up to ten numbered folders (“01”, “02”, “03” … through “10”). Each folder may contain up to 10 audio clips. Since the player isn’t very sophisticated, it’s advisable to use numbered filenames for these clips as well (‘001.WAV’, ‘002.WAV’ … through 010.WAV). This way, the folders can hold up to 100 audio clips.
From the root directory of the microSD card, only the first two audio files found are used. The first is played when the phone’s receiver is picked up. This is usually the dial tone that should be heard in the receiver while dialing the phone number, though it can also be a spoken instruction or similar. The second audio clip, usually the “busy tone,” is played if, based on the dialed phone number, no audio clip can be found. In principle, this is only possible if there are fewer than 100 playable clips in the folders on the microSD card.
The link between the phone number dialed by the user on the connected phone and the audio clip that is ultimately played is very simple: the very first digit dialed determines the folder (1 for folder ‘01’, 2 for folder ‘02’, etc.), and the very last digit dialed in the sequence determines the audio clip to be played within that folder (1 for ‘001. WAV’, 2 for ‘002.WAV’, etc.). If only one number is dialed within the maximum sequence number timeout (2.5 sec.) of the dialing phase, this is the clip number in the first folder ‘01’.
In principle, the Retrophone’s player can play audio files in WMV/WMA (WAV) and MP3 formats. When encoding to MP3, a ‘constant bitrate’ (CBR) of 128 kbps gives the best results. However, in practice, MP3 files in the numbered folders are sometimes not recognised properly. The dial tone and busy tone, the files for which are stored on the root level of the memory card, cause fewer problems in this regard.
The WMV/WMA audio format is compressed and requires decompression during playback by the audio player. As these are often short clips in practice, it is recommended to choose the most standardised (uncompressed) WAV variant. Although this results in slightly larger audio files, they offer significantly better playback quality. Encode the files at a maximum of 32 kHz, 16-bit in mono (stereo is, of course, pointless for this application) for the best results. Theoretically, sampling rates of 44.1 kHz and even 48 kHz at 24-bit resolution are possible, but the resulting improvement in quality is far beyond the technical capabilities of a mobile phone speaker.
The best audio converters for both Windows and Mac are fre:ac (free and open-source), MediaHuman Audio Converter (free, user-friendly), and Switch Audio Converter (paid, but very versatile). These programs support formats such as MP3, WAV, FLAC, and M4A, and offer batch conversion, making it easy to convert multiple files to a different audio format all at once.
To back up the current contents of the memory card or load a completely new set of audio clips, you must first make the memory card accessible in your computer’s file explorer (Windows: File Explorer, Mac: Finder). To do this, first turn off the Retrophone using the power button on the front panel. You can also unplug the 9-volt AC adapter. Make sure the red LED is off.
To access the files on the memory card using your computer, we recommend removing the memory card from the Retrophone’s slot. To do this, gently push the SD card slightly further into the slot from the side of the case. When you release the card, a spring mechanism will cause it to pop out slightly, making it easy to remove from the slot. Some computers have a slot where the microSD card can be inserted directly. However, it is also always possible to temporarily place the memory card in a card adapter—such as a card reader that looks like a USB flash drive or a larger SD card—to make it accessible on your computer. When you are finished, you can carefully push the memory card back into the slot. The Retrophone is then ready for use again.
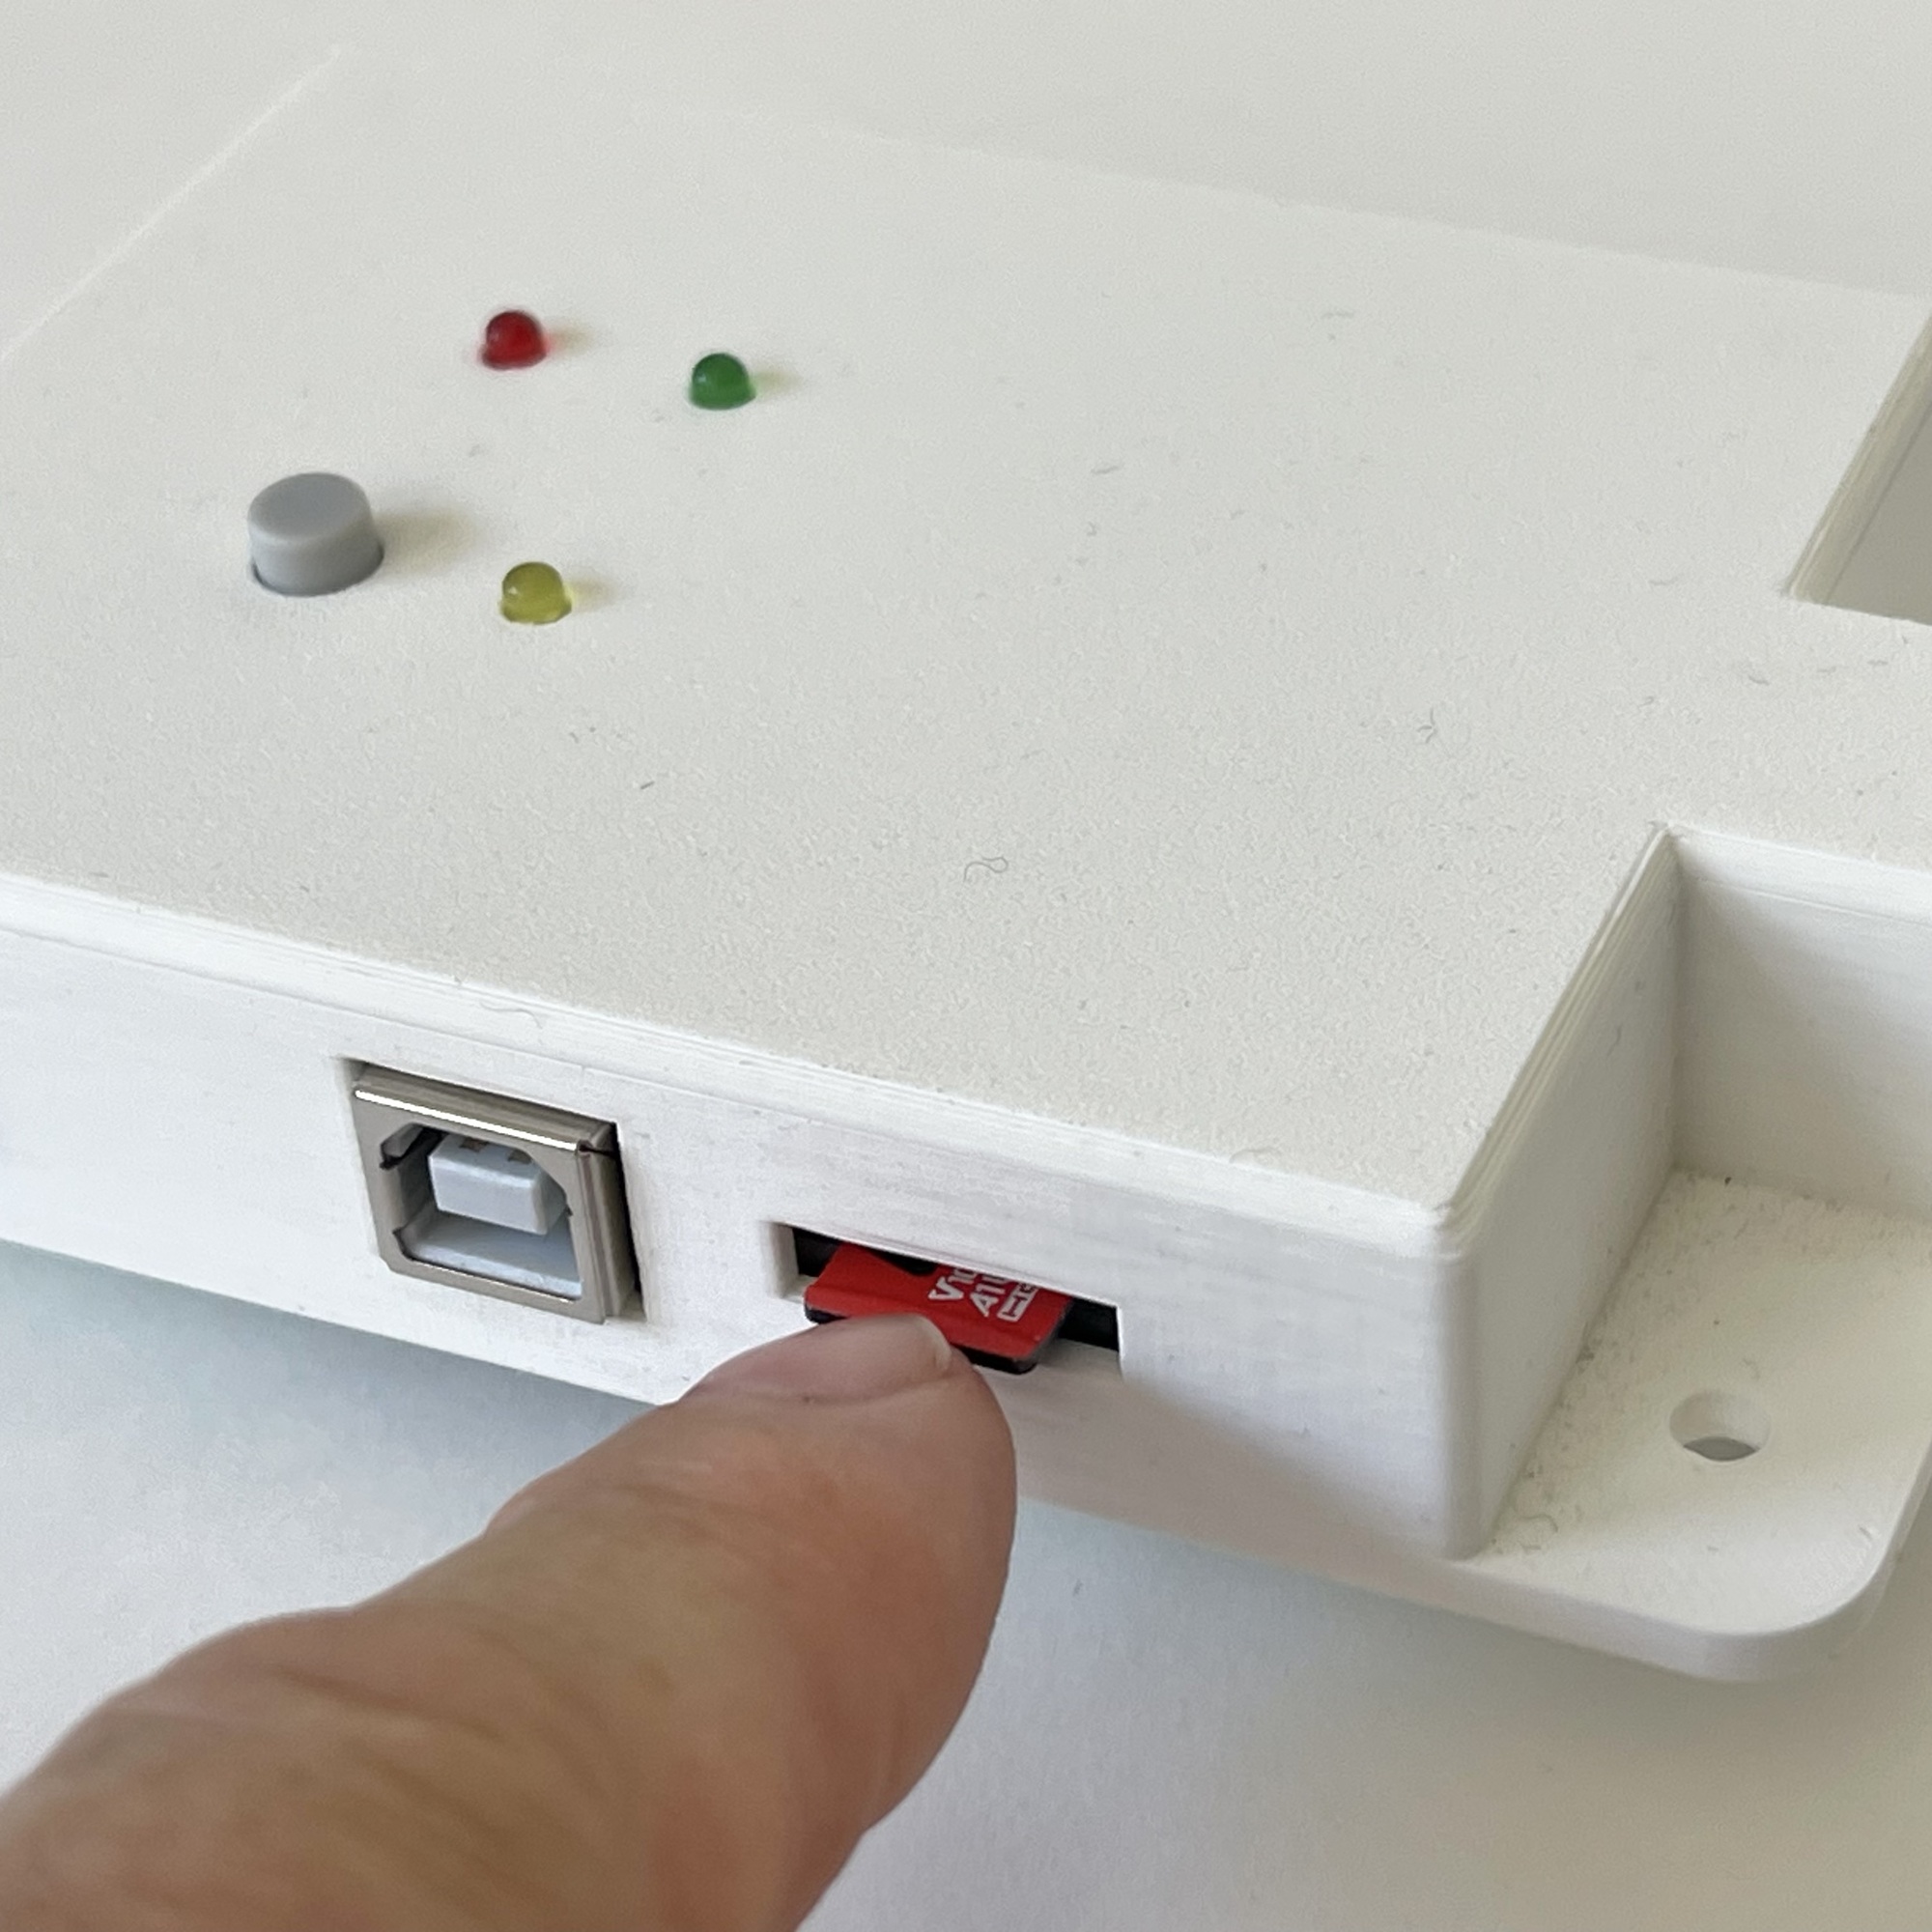

If your Retrophone has a square USB-B port (this does not apply to all models), you can use a USB-A (standard flat plug) to USB-B (square) cable to connect the Retrophone to your computer. The advantage of this is that you don’t need to use a microSD card adapter, but keep in mind that this connection isn’t as fast as the one described above. And remember that when you’re done and want to use the Retrophone again, you’ll need to disconnect the USB cable. As long as the microSD card is “claimed” by your computer, the Retrophone cannot play audio files from it!
The Retrophone’s audio player has very limited “intelligence.” The player selects tracks based entirely on the order of the files on the microSD card. The (sequentially numbered) file names, which can be used on your computer to sort the files in a specific order, are ignored! Only the order in which the files were written from your computer to the microSD card determines the sequence number assigned by the player.
This is important to understand, because it explains why it is not possible to renumber files later in the naming scheme, or to insert files into the naming sequence on the memory card. These additional files will simply be written physically after the files already present on the memory card, regardless of the visible order based on their filenames. The underlying physical order on the microSD card will therefore differ from the folder view on your computer in those cases!
Once the new set of audio clips has been compiled on the computer, it can be written to an empty microSD card in one go.
Note: If you are using a Mac, “hidden” files will have been written to the microSD card that may confuse the player. It is important that these hidden “AppleDouble” metadata files (.DS_Store, etc.) are deleted. You can do this easily by opening a macOS Terminal and navigating to the mounted memory card (e.g., /Volumes/RETROPHONE) on your Mac.
If you have copied the bash script ‘prepare-card.sh’ to the microSD card, you can use it for this purpose. This script also automatically renames the audio files in all folders to sequential numbers. You can run the script in the macOS Terminal using the command ./prepare-card.sh
It is also possible to use the standard command `dot_clean` (dot_clean -m /Volumes/RETROPHONE) available on your Mac in the macOS Terminal for cleaning up.
The final step is to “eject” the microSD card from your computer or remove it from the card adapter. After disconnecting the USB cable (method 2 above) or reinserting the memory card into the Retrophone’s slot (method 1 above), you can turn the Retrophone back on and check whether all audio clips are accessible and playable.
Just like with traditional telephones of the past, some “crosstalk” from the microphone (which is not used by the Retrophone) in the handset may be heard in the earpiece. Anyone who blows into the handset will hear this sound in the earpiece. If you find this distracting, you can simply remove the microphone from the mouthpiece of the handset (unscrew the bottom cap on the handset).
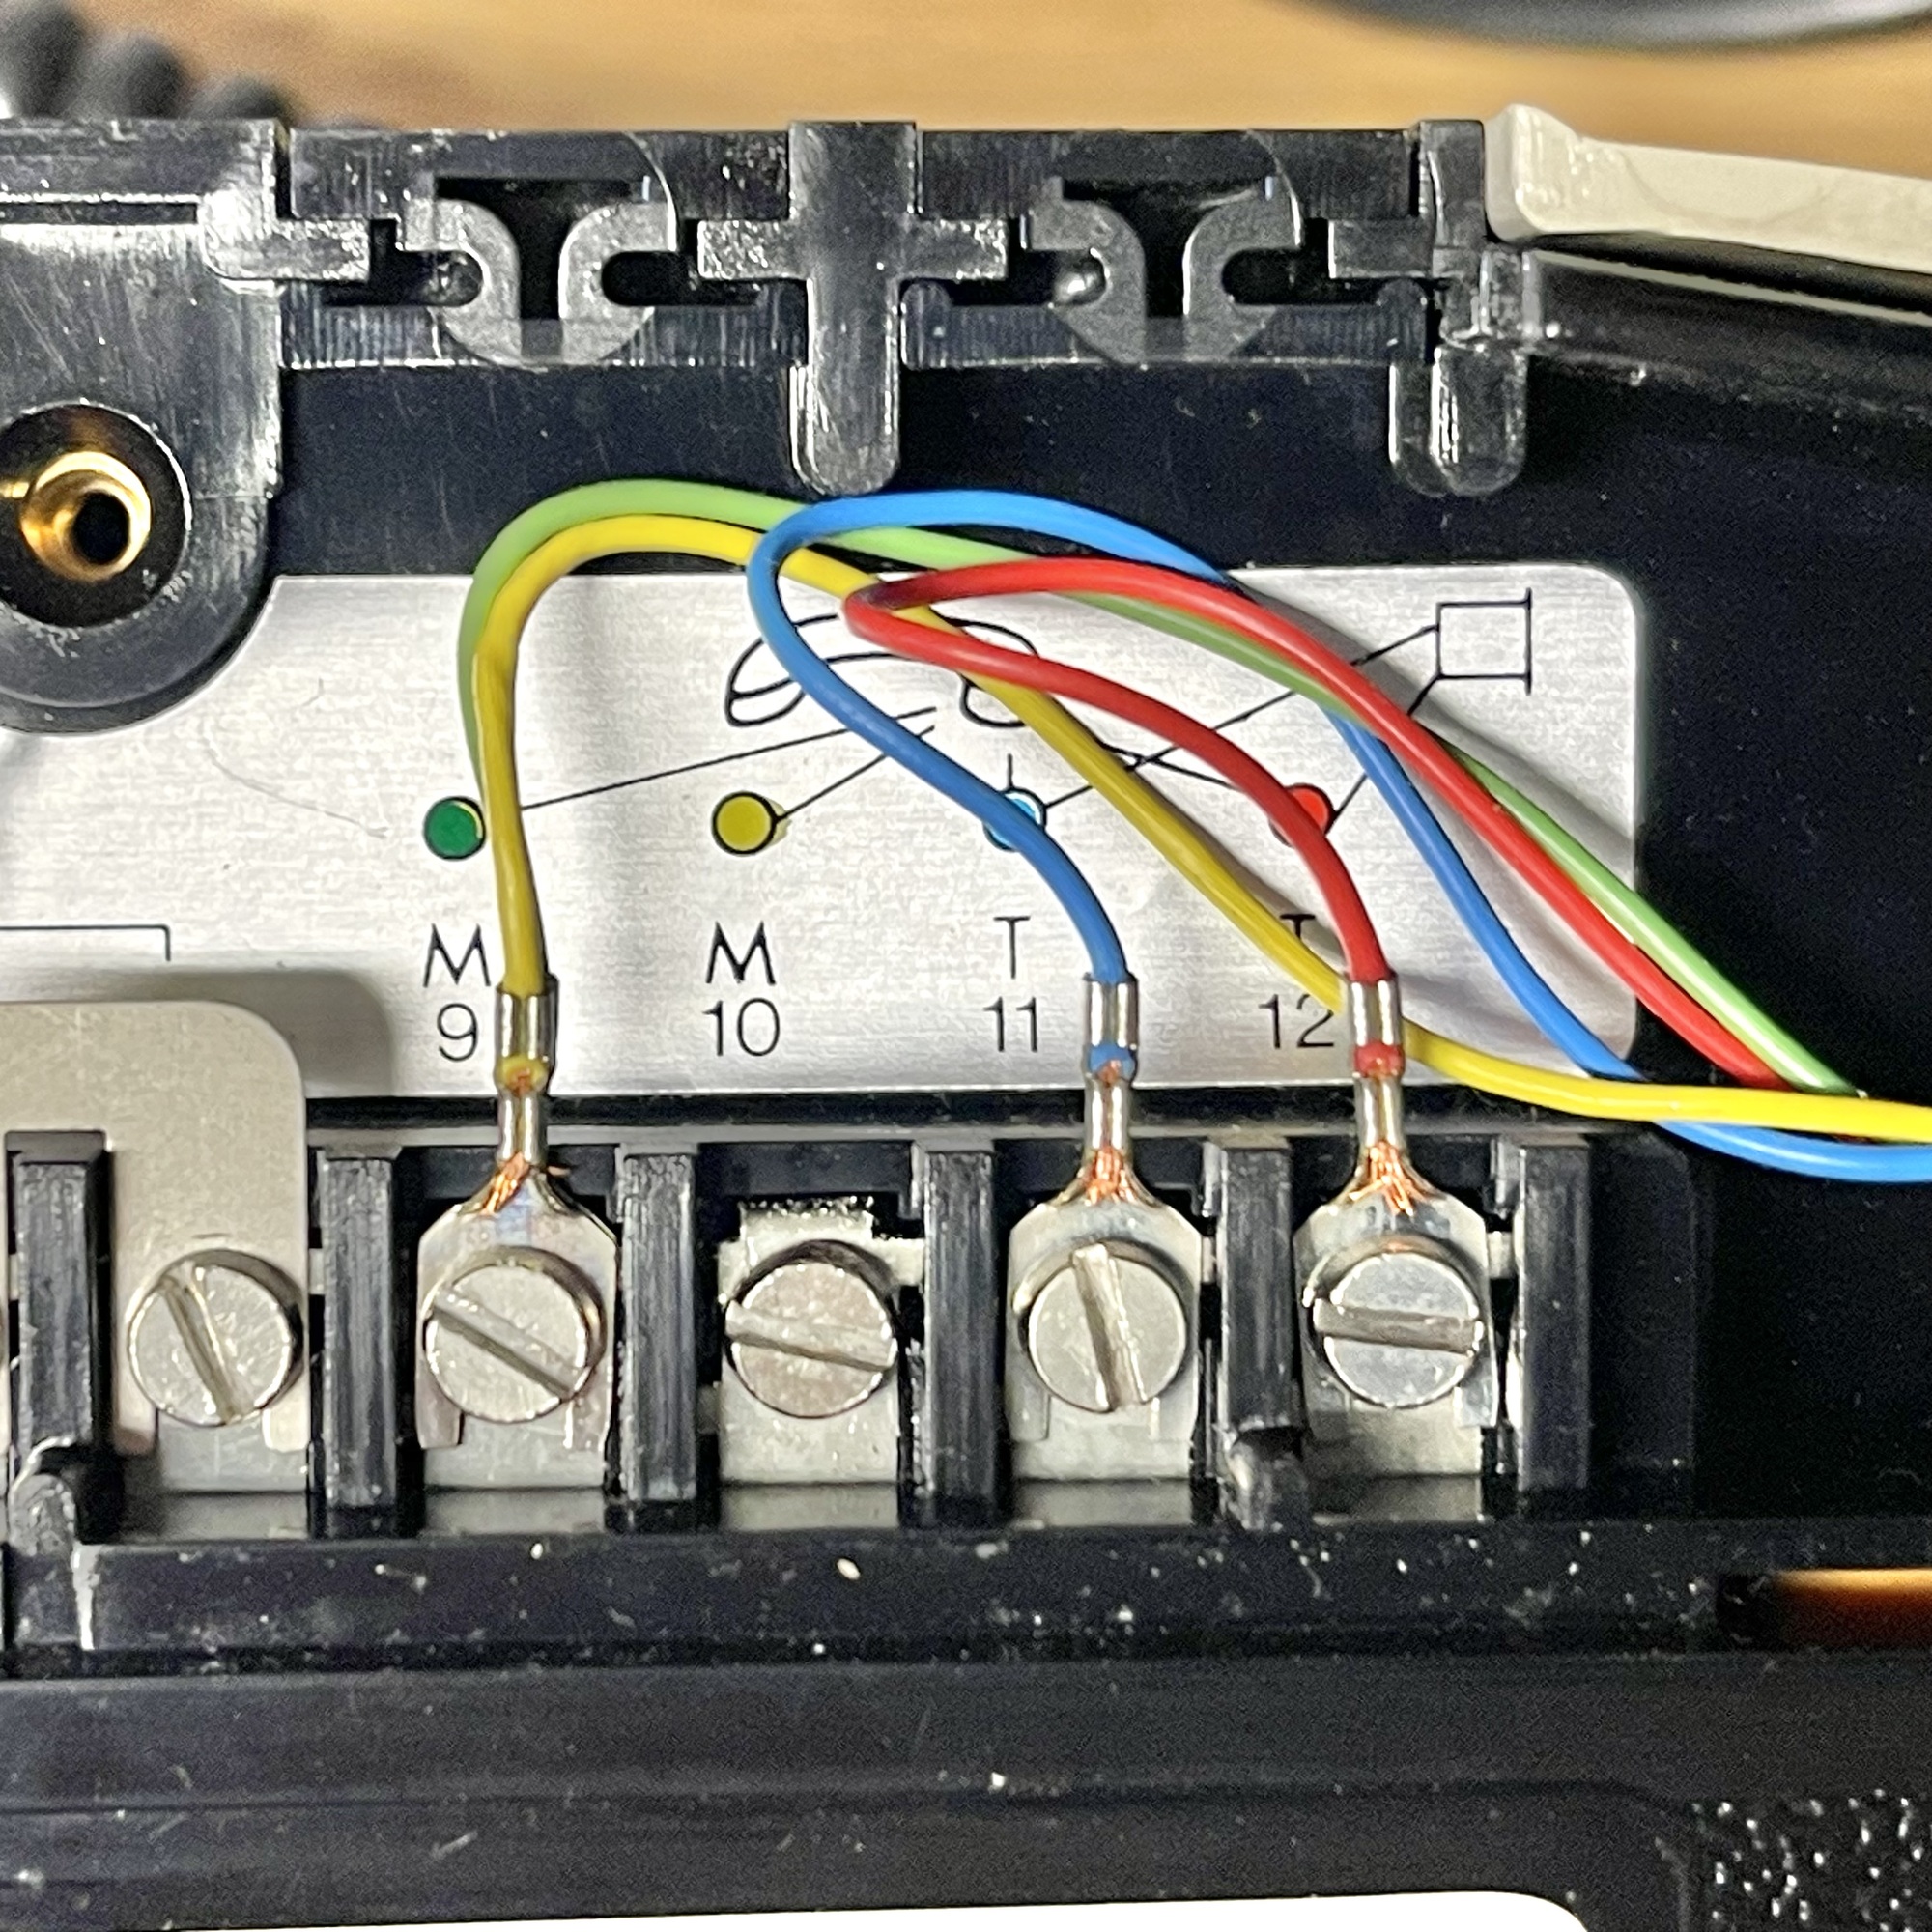
If you want to solve this in a technically neat way on the commonly used Dutch T65 telephone, you can open the cover on the bottom of the phone and connect the wire under terminal 10 (yellow) to the wire under terminal 9 (green), thereby bypassing the microphone in the handset. However, the Retrophone works perfectly well even without these modifications.